Belt transport system: Difference between revisions
m (→Expert: cleaned up some of the links, still a lot to do though) |
(Massive overhaul and cleanup, almost completely rewritten) |
||
| Line 1: | Line 1: | ||
{{Languages}} | {{Languages}} | ||
== | The belt transport system is the first system the [[player]] will use to transport items from place to place. It, along | ||
with [[Railway|trains]], and [[Logistic network|Logistic robots]], make up the systems of item transportation in | |||
Factorio. | |||
Belts specifically are used to transport [[Items]]. By developer design, all transport belts run without using energy. | |||
This is to reduce complexity and allow belts to be placed outside of electricity networks. | |||
== All types of Transport belts == | |||
Below is a chart of all the Transport Belts present and available for use in Factorio. | |||
{| class="wikitable" | {| class="wikitable" | ||
! [[Transport belts]] !! [[Underground belts]] !! [[Splitters]] !! Max. throughput ([[Items]] per [[game-second]]) !! Needed research | ! [[Transport belts]] !! [[Underground belts]] !! [[Splitters]] !! Max. throughput ([[Items]] per [[game-second]]) !! Needed research | ||
| Line 27: | Line 35: | ||
|} | |} | ||
== Tiers of belts == | |||
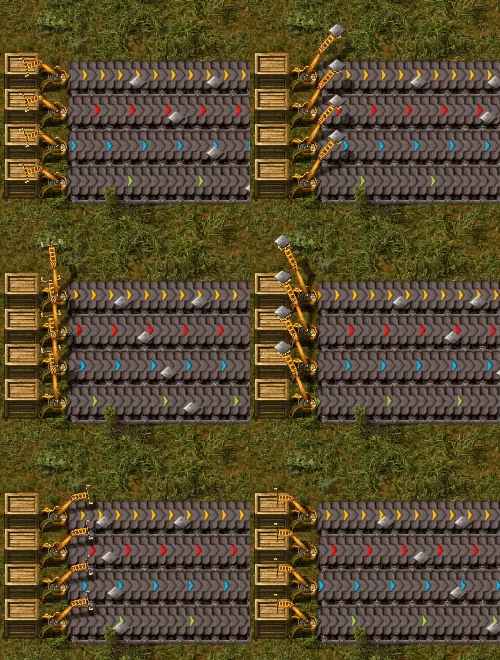
There are 3 different tiers of belts available for use. [[Transport belt|The basic type]] has a yellow color and is | |||
the slowest. [[Fast transport belt|Next tier up]] has a red color, and is twice is fast as the yellow tier. [[Express | |||
transport belt|The third and final tier]] is colored blue and is three times as fast. | |||
=== Merging and un-merging === | [[File:Transport_belts_speed.gif|300px|thumb|top|Animation showing the three types of belt and their speed (from top to bottom: regular belts, fast belts and express belts).]] | ||
Belts have | |||
Un-merging a mixed belt is fairly easy too, since an underground belt will block half of | {{clear}} | ||
== Mechanics of belts == | |||
This section describes the mechanics of transport belts. | |||
=== Merging and un-merging belts === | |||
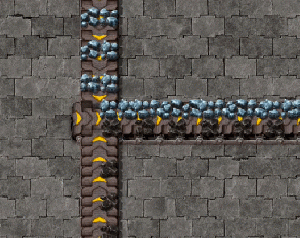
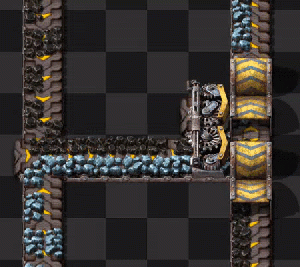
Belts of all tiers have 2 lanes for items to ride on. This allows for either a double flow of one material, or with | |||
some careful setup, transporting two different materials on the same belt. Mixed belts can be beneficial for | |||
smelting ore, or producing items with many different ingredients such as [[science pack 3]]. Un-merging a mixed belt is | |||
fairly easy too, since an underground belt will block half of the belt. | |||
[[File:Transport_belts_merge.gif|300px|top]] [[File:Transport_belts_unmerge.gif|300px|top]] | [[File:Transport_belts_merge.gif|300px|top]] [[File:Transport_belts_unmerge.gif|300px|top]] | ||
Commonly, merging and un-merging is done by using a [[splitter]]. | |||
=== Belt balance === | |||
Due to how items are placed onto belts by [[inserters]], their lanes can sometimes become unbalanced. In order to | |||
maintain throughput, balancing the lanes may be necessary. The gifs below show how to do this: | |||
[[File:Transport_belts_balance1.gif|300px|top]] [[File:Transport_belts_balance2.gif|300px|top]] | [[File:Transport_belts_balance1.gif|300px|top]] [[File:Transport_belts_balance2.gif|300px|top]] | ||
=== Belt Throughput === | |||
Maximizing the throughput is important, since it will keep belts efficient. Therefore some definitions need to | |||
be introduced: | |||
Maximizing the throughput is important, since it will keep belts efficient. Therefore some definitions need to be introduced: | |||
; Speed | ; Speed | ||
: How fast | : How fast a belt moves. | ||
; Density | ; Density | ||
: How tight are the items put | : How tight are the items put onto the belts. | ||
; Throughput | ; Throughput | ||
: This is speed * density. It describes how many items pass by in a given time. | : This is speed * density. It describes how many items pass by in a given time. | ||
So there are | So, there are three opportunities to enhance the throughput: | ||
* More density | |||
Sometimes items have little spaces next to each other that aren't big enough for other items to fit | |||
in. In this case reordering the items can still increase the density. This can be done by temporarily increasing the | |||
belt speed on a single tile or by merging 2 lanes with an inserter. | |||
The gif below shows the problem with a low density belt, and the right shows how it can be rectified. (Notice the red belt) | |||
[[File:Transport_belts_density.gif|top|300px]] | [[File:Transport_belts_density.gif|top|300px]] | ||
* More speed | |||
If the belts in the factory are already at maximum density, their speed can still be upgraded with better belts. Finding the bottleneck is the first thing that needs to be done, usually it can be discovered quite | |||
easily. There will be a part of the belt where the items don't move quickly (or at all) or stop at maximum density | |||
and suddenly they come to a point where this 'stop and go' effect releases itself, the bottleneck has been found. | |||
In most cases, this will be the place where belt optimization is needed. | |||
* More belts | |||
Adding additional parallel belts can also increase the throughput. Simply place more belts carrying the item that needs throughput, and add [[splitter]]s to balance items between them. | |||
=== Belt physics === | |||
Moving fast can be essential to defend alien attacks in time. Running on a belt will increase or decrease the movement | |||
speed of the [[player]] accordingly to the belts speed. That is why building a belt towards your [[defense]]s can | |||
be beneficial. | |||
However, the player is not the only unit that can be moved by transport belts. Additionally, biters and spitters can be | |||
moved. This can be abused to improve your defense. Firstly, biters will have a harder time to reach your walls when | |||
placing express transport belt in front of them. Secondly, spitters can be moved closer to your walls. That way more | |||
turrets can attack a single spitter at once. | |||
Another useful usage are [[car]]s on transport belts. Cars have an inventory and can be filled by [[inserters]]. | |||
So, they can be used as moving boxes on belts. This has several advantages: Firstly the throughput of the | |||
belt-car-boxes is amazingly high, secondly the inserter stack size bonus does apply here and make inserters more | |||
effective. | |||
== Splitters == | |||
[[Splitters]] are another form of item manipulation. Splitters are a 2x1 tile that split incoming [[Item]]s on belts | |||
from one input to two outputs, in a 50/50 ratio. They are used to divide resources between two belts, or balance | |||
multiple belts. | |||
=== | == Mechanics of splitters == | ||
The behavior of splitters looks simple at first glance. But they are not that simple. Splitters have an astonishing amount of uses. | The behavior of splitters looks simple at first glance. But they are not that simple. Splitters have an astonishing amount of uses. | ||
* | * Splitters have two input belts, and two output belts. If the splitter receives items on one belt, it will split the | ||
input evenly between it's two sides. | |||
* If one of the outputs is fully backed-up and the splitter cannot split evenly, it will put all input on it's other | |||
output. | |||
* Splitters can also take two inputs and one output. | |||
The | The output will be an even mix of both the inputs. This can be | ||
used to efficiently merge two belts together. When it does this, the items will not be shuffled. | |||
In order to join/split belts, the splitter must be the same speed as the incoming belts, otherwise the splitter will | |||
become a bottleneck. | |||
This behavior | However, when both belts are at full capacity, the splitter will prefer one side, and use the other to fill gaps. This | ||
behavior is due to the game being unable to fairly reverse-split the belts. Explained by the developers: | |||
''"But there are fundamental problems with equal joining. How exactly will you define it? Once you have an available | |||
item to move to the belt on the left belt, you would have to wait, if some other item on the right belt doesn't | |||
arrive, as it would be the time for the right belt to be activated. But how long do you wait? And once you wait you | |||
limit the throughput of the splitter."'' | |||
This behavior can be used to prioritize input from certain belts, such as from a storage. | |||
== Underground belts == | |||
Underground belts can be used to cross different flows of items without interfering. They move items like a [[Transport belts|normal belt]]. | Underground belts can be used to cross different flows of items without interfering. They move items like a [[Transport belts|normal belt]]. | ||
| Line 139: | Line 167: | ||
* The half of the underground belt tile with a belt can accept input from the side. The other half (with a tunnel entrance) blocks incoming items. | * The half of the underground belt tile with a belt can accept input from the side. The other half (with a tunnel entrance) blocks incoming items. | ||
This last fact is important, because it can be used to do some tricks. | ''This last fact is important, because it can be used to do some tricks.'' | ||
[[ | == See also == | ||
* [[Splitter]] | |||
* [[Transport belt]] | |||
* [[Time]] | |||
* [[Items]] | |||
Revision as of 20:36, 3 December 2016
The belt transport system is the first system the player will use to transport items from place to place. It, along
with trains, and Logistic robots, make up the systems of item transportation in
Factorio.
Belts specifically are used to transport Items. By developer design, all transport belts run without using energy. This is to reduce complexity and allow belts to be placed outside of electricity networks.
All types of Transport belts
Below is a chart of all the Transport Belts present and available for use in Factorio.
| Transport belts | Underground belts | Splitters | Max. throughput (Items per game-second) | Needed research |
|---|---|---|---|---|
| Basic transport belt | Basic underground belt | Basic splitter | 13.393 | Logistics 1 |
| Fast transport belt | Fast underground belt | Fast splitter | 26.786 | Logistics 2 |
| Express transport belt | Express underground belt | Express splitter | 40.179 | Logistics 3 |
Tiers of belts
There are 3 different tiers of belts available for use. The basic type has a yellow color and is the slowest. Next tier up has a red color, and is twice is fast as the yellow tier. [[Express transport belt|The third and final tier]] is colored blue and is three times as fast.
Mechanics of belts
This section describes the mechanics of transport belts.
Merging and un-merging belts
Belts of all tiers have 2 lanes for items to ride on. This allows for either a double flow of one material, or with some careful setup, transporting two different materials on the same belt. Mixed belts can be beneficial for smelting ore, or producing items with many different ingredients such as science pack 3. Un-merging a mixed belt is fairly easy too, since an underground belt will block half of the belt.
Commonly, merging and un-merging is done by using a splitter.
Belt balance
Due to how items are placed onto belts by inserters, their lanes can sometimes become unbalanced. In order to maintain throughput, balancing the lanes may be necessary. The gifs below show how to do this:
Belt Throughput
Maximizing the throughput is important, since it will keep belts efficient. Therefore some definitions need to be introduced:
- Speed
- How fast a belt moves.
- Density
- How tight are the items put onto the belts.
- Throughput
- This is speed * density. It describes how many items pass by in a given time.
So, there are three opportunities to enhance the throughput:
- More density
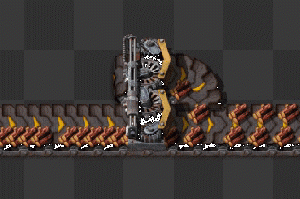
Sometimes items have little spaces next to each other that aren't big enough for other items to fit in. In this case reordering the items can still increase the density. This can be done by temporarily increasing the belt speed on a single tile or by merging 2 lanes with an inserter.
The gif below shows the problem with a low density belt, and the right shows how it can be rectified. (Notice the red belt)
- More speed
If the belts in the factory are already at maximum density, their speed can still be upgraded with better belts. Finding the bottleneck is the first thing that needs to be done, usually it can be discovered quite easily. There will be a part of the belt where the items don't move quickly (or at all) or stop at maximum density and suddenly they come to a point where this 'stop and go' effect releases itself, the bottleneck has been found. In most cases, this will be the place where belt optimization is needed.
- More belts
Adding additional parallel belts can also increase the throughput. Simply place more belts carrying the item that needs throughput, and add splitters to balance items between them.
Belt physics
Moving fast can be essential to defend alien attacks in time. Running on a belt will increase or decrease the movement speed of the player accordingly to the belts speed. That is why building a belt towards your defenses can be beneficial.
However, the player is not the only unit that can be moved by transport belts. Additionally, biters and spitters can be moved. This can be abused to improve your defense. Firstly, biters will have a harder time to reach your walls when placing express transport belt in front of them. Secondly, spitters can be moved closer to your walls. That way more turrets can attack a single spitter at once.
Another useful usage are cars on transport belts. Cars have an inventory and can be filled by inserters. So, they can be used as moving boxes on belts. This has several advantages: Firstly the throughput of the belt-car-boxes is amazingly high, secondly the inserter stack size bonus does apply here and make inserters more effective.
Splitters
Splitters are another form of item manipulation. Splitters are a 2x1 tile that split incoming Items on belts from one input to two outputs, in a 50/50 ratio. They are used to divide resources between two belts, or balance multiple belts.
Mechanics of splitters
The behavior of splitters looks simple at first glance. But they are not that simple. Splitters have an astonishing amount of uses.
- Splitters have two input belts, and two output belts. If the splitter receives items on one belt, it will split the
input evenly between it's two sides.
- If one of the outputs is fully backed-up and the splitter cannot split evenly, it will put all input on it's other
output.
- Splitters can also take two inputs and one output.
The output will be an even mix of both the inputs. This can be used to efficiently merge two belts together. When it does this, the items will not be shuffled.
In order to join/split belts, the splitter must be the same speed as the incoming belts, otherwise the splitter will become a bottleneck.
However, when both belts are at full capacity, the splitter will prefer one side, and use the other to fill gaps. This behavior is due to the game being unable to fairly reverse-split the belts. Explained by the developers:
"But there are fundamental problems with equal joining. How exactly will you define it? Once you have an available item to move to the belt on the left belt, you would have to wait, if some other item on the right belt doesn't arrive, as it would be the time for the right belt to be activated. But how long do you wait? And once you wait you limit the throughput of the splitter."
This behavior can be used to prioritize input from certain belts, such as from a storage.
Underground belts
Underground belts can be used to cross different flows of items without interfering. They move items like a normal belt.
- You can cross any number of entities and all types of ground, like water, swamps, etc. (input and output of course over water)
- You can cross other underground stuff (any number of underground belts or underground pipes). They won't be mixed.
- For the connection only the endpoints (entry-side and exit-side) are relevant.
- The maximum distance underground is 4 tiles.
- An underground belt pair with a blocked output stores up to 20 items. (Per lane? Untested!)
- If you mine an underground belt, up to 20 items are recovered, the remaining items in the underground are placed into your inventory.
- The half of the underground belt tile with a belt can accept input from the side. The other half (with a tunnel entrance) blocks incoming items.
This last fact is important, because it can be used to do some tricks.
