Belt transport system: Difference between revisions
(→Belts) |
|||
| Line 96: | Line 96: | ||
* [[Crafting network]] | * [[Crafting network]] | ||
* [[Logistic network]] | * [[Logistic network]] | ||
* [[Transport network]] | |||
** [[Splitters]] | |||
** [[Underground belts]] | |||
* [[Transport]] | |||
* [[Crafting network]] | |||
* [[Logistic network]] | |||
* [http://www.factorioforums.com/forum/viewtopic.php?f=8&t=3370 Intersection with 4 belts from every side] | |||
* [[Transport belts/Transport other entities]]: even the car can be transported with belts. | |||
* [[Transport belts/Why do belts use no energy?|Why do belts not require power?]]: Some reasons... | |||
* [[Transport belts/Speedup Walking]]: Walk/run in belt direction add the speed of the belt to your own. | |||
* [[Transport belts/Defense]]: Use the Express belt to slow down the enemies | |||
* [[Transport belts/Physics]] | |||
* [[Transport belts/Turns]] | |||
* [[Transport belts/Blocking items]] | |||
* [[Transport belts/Side insert]] | |||
* [[Transport belts/Optimizing|Transport belt Optimising]] | |||
* [[Transport belts/Side insert]] | |||
* [http://www.factorioforums.com/forum/viewtopic.php?f=5&t=6914&p=56388#p56388 Throughput and bottlenecks]. | |||
* [http://www.factorioforums.com/forum/viewtopic.php?f=18&t=5316&start=20#p54495 Speed, Distance, Throughput, Compression] | |||
* [http://www.factorioforums.com/forum/viewtopic.php?f=5&t=7221 Tutorial for Belt Speed, Density and Throughput] | |||
* [[Transport belts/Belt lane]] for more about usage of the two lanes of a belt. | |||
* [[Transport belts/Optimizing|Transport belt Optimising]] | |||
* [[Transport belts/Turns]] for details about turns. | |||
* [[Transport belts/Optimizing| Transport belt Optimising]] about other ways to speed up this bottleneck. | |||
* [http://www.factorioforums.com/forum/viewtopic.php?f=5&t=6801&p=54025#p54003 Testing fast belt corners] (interesting video) | |||
{{MachineNav}} | {{MachineNav}} | ||
[[Category: Transport network]] [[Category: Belt transport system]] | [[Category: Transport network]] [[Category: Belt transport system]] | ||
Revision as of 10:16, 22 March 2016
The belt transport system is the first transport system available in Factorio, and together with Trains and Logistics Robots make up the backbone of any Factorio base. Transport belts (sometimes called conveyors) are used to transport Items. Belts don't need power for transportation. This is one of the many Mysteries of the Factorio World.
Beginner
| Transport belts | Underground belts | Splitters | Speed (tiles/second) | Needed research |
|---|---|---|---|---|
| Basic transport belt | Basic underground belt | Basic splitter | ~1.8 | Logistics 1 Basic underground belt and Basic splitter |
| Fast transport belt | Fast underground belt | Fast splitter | ~3.6 | Logistics 2 |
| Express transport belt | Express underground belt | Express splitter | ~5.6 | Logistics 3 |
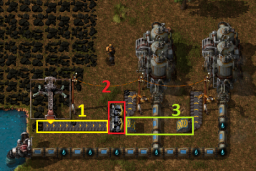
Transport belts are just moving items. To take/put items onto a belt use Inserters.
Differences between the belt tiers
The main difference between different tiers of belt is the speed at which they operate. As belt is upgraded from yellow to red to blue, it gets faster and is able to move more items. The Physics page has some technical information on exact values for each tier of transport belt.
Merging and un-merging
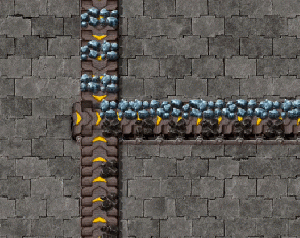
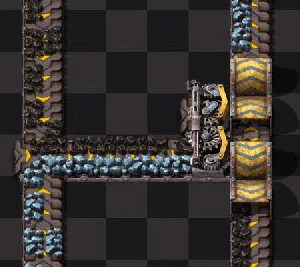
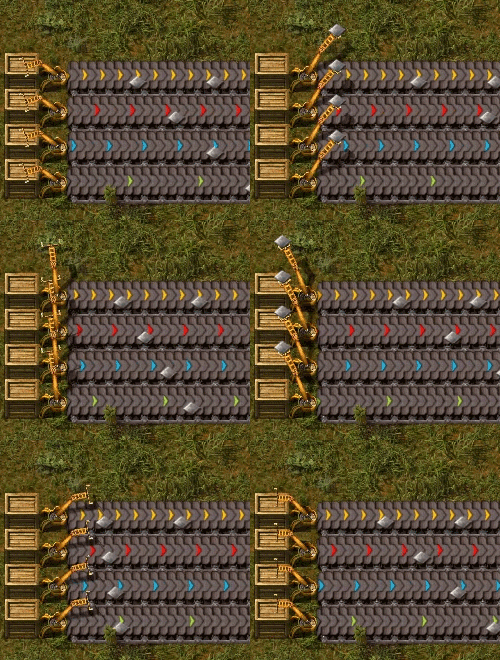
Belts have two lanes that can be used for transporting. This allows for either a double flow of one material, or with some careful setup, transporting two different materials on the same belt. Mixed belts can be beneficial for smelting ore, or producing items with a lot of ingredients such as the science pack 3. Un-merging a mixed belt is fairly easy too, since an underground belt will block half of your a belt. So there is no reason to be afraid of mixed belts at all.
Balancing belts
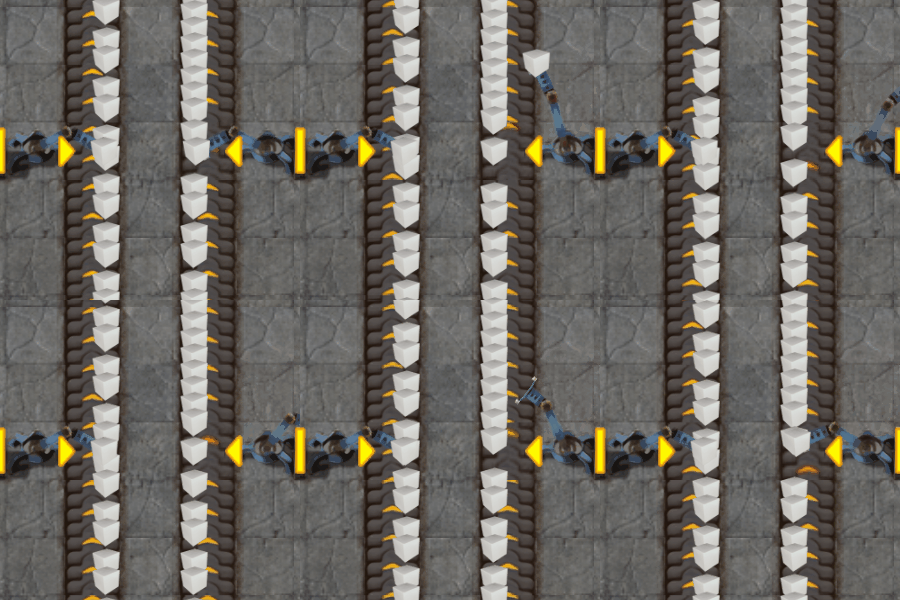
Sometimes you will find one side of a belt more empty than the other. In this care rebalancing the belt can be helpful.
The left design only rebalances equally if one side of the belt is empty while the right version always balances equally.
Advanced
Speed, Density and Throughput: About finding bottlenecks
Maximizing the throughput is important, since it will keep your belts efficient. Therefore we need to introduce some definitions:
- Speed
- How fast does a belt move.
- Density
- How tight are the items put on the belts.
- Throughput
- This is speed * density. It describes how many items pass by in a given time.
So there are two opportunities to enhance the throughput:
- More density
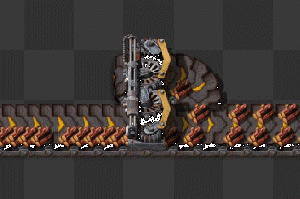
- Sometimes items have little spaces next to each other that aren't big enough for other items to fit in. In this case reordering the items can still increase the density. This can be done by temporary increasing the belt speed on a single tile or by merging 2 lanes with an inserter.
- More speed
- In case your belts already are at maximum density you can still upgrade your speed with better belts. But first you have to find the bottleneck.
The bottleneck can be seen quite easy, if there is a part of a belt, where the items sometimes stop or don't move (or don't move fast) at maximum density and suddenly they come to a point, where this 'stop and go' releases itself and they run free and are not so tight on the belt. This is in most cases the exact place, where you need to optimize your belts.
Belts
| Type | Max. throughput (Items per game-second) | Speed (Tiles per game-second) | Max. density (Items per tile) | Required technologies |
|---|---|---|---|---|
| Basic transport belt | 13.393* | 1.875* | 7.143* | none |
| Fast transport belt | 26.786* | 3.750* | 7.143* | Logistics 2 |
| Express transport belt | 40.179* | 5.625* | 7.143* | Logistics 3 |
- experimental value: See Transport belt experiments for more detailed information.
Splitters
Underground belts
See also
- Transport network
- Transport
- Crafting network
- Logistic network
- Transport network
- Transport
- Crafting network
- Logistic network
- Intersection with 4 belts from every side
- Transport belts/Transport other entities: even the car can be transported with belts.
- Why do belts not require power?: Some reasons...
- Transport belts/Speedup Walking: Walk/run in belt direction add the speed of the belt to your own.
- Transport belts/Defense: Use the Express belt to slow down the enemies
- Transport belts/Physics
- Transport belts/Turns
- Transport belts/Blocking items
- Transport belts/Side insert
- Transport belt Optimising
- Transport belts/Side insert
- Throughput and bottlenecks.
- Speed, Distance, Throughput, Compression
- Tutorial for Belt Speed, Density and Throughput
- Transport belts/Belt lane for more about usage of the two lanes of a belt.
- Transport belt Optimising
- Transport belts/Turns for details about turns.
- Transport belt Optimising about other ways to speed up this bottleneck.
- Testing fast belt corners (interesting video)
