Tutorial:Quick start guide
Getting Started
So, you've just picked up Factorio, played through the tutorial and now have no clue what to do? Well, let's try to ease you into the game a little bit.
Starting your game
To begin you are going to be presented with the main menu. I'm sure you have all run into one of these before.
We want to select "Play" and "New Game". You will be presented with a nice big menu for customization of your world. The default settings are fine for a first play through.
World generator
You can fiddle with whatever you want to make the world generate how you want to. Some things make the game easier while others make it harder.
Each resource type, along with enemy bases, is controlled by 3 values: frequency, size and richness. Frequency relates to how often you will see a vein of each resource within the game world, size relates to how many tiles each of the veins will cover, whilst richness relates to how much of the resource each tile will produce before running out.
For an easier experience for beginners, place iron ore, copper ore, stone, coal and crude oil onto very high under frequency and very good under richness. This will ensure you have plenty of resources available, and that you will not have to venture far from the starting area to find resources. Also, place the size value of enemy bases onto very small to lower the number of enemies.
If you want to know more on the world generator, read this article..
Peaceful mode
If you want to enjoy the building and not be bothered by enemies, check the "peaceful mode" option. The enemies will still spawn, but they'll stay where they are until you go to them.
Once you have decided press generate, and you will get dumped into a new world, awaiting your prowess.
Useful Key Bindings
While all the keys and key combinations can be found in the controls of the game option, a lot of people tend not to look there, so here are the essentials. Game/Keyboard bindings Please refer to the Game/Keyboard bindings to know more about the keybindings and how to configure them.
The very first moments
Resources
Make sure that you have these four resources close to your spawn location. You want
- Coal,
- Copper ore,
- Iron ore, and
- Stone
within a reasonable proximity of each other; the farther apart they are, the harder it will be to use them together.
If your spawn area doesn't hold one of these resources, or they are too scarce or too far apart, simply quit without saving and generate a new game.
Later we will also need
and eventually
Factorio uses these 6 basic resources. Everything is made out of them.
Craft a pickaxe
Go towards whichever resource you choose and hold right click. This will give you a small progress bar at the bottom, which when complete will give you some of those resources. You might find that chopping trees and mining ores manually is really slow. If you look at your character, he's just bashing at them with a stick! How about a tool upgrade? Press E to open up your inventory and the crafting menu. Select the gears tab up the top for "Production", and left click on the iron pickaxe in there. This will increase your mining speed by a significant amount.
Placing mines and furnaces
You begin your journey with a humble Stone Furnace and a Burner Mining Drill. What do we do with these? First of all, you should place your drill on the edge of an iron deposit, facing towards a Furnace.
You can change the direction of the Drill by either pressing "R" before you place it, or after by hovering over it with the mouse and pressing "R". The little yellow arrow shows where the mined iron ore will come out. You want the Furnace to be in front of that arrow, so that the drill automatically inputs into the furnace. You should get something like this.
Remember to press "ALT" to activate the detailed view. This makes it easier to see what is inputting what into where.
Feeding with fuel
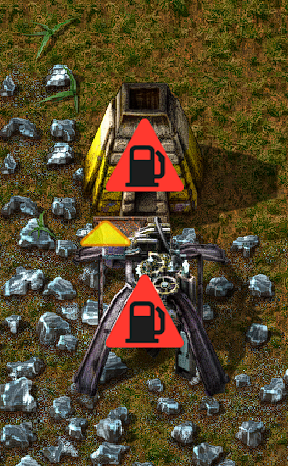
Great! But what does the big flashing red symbol mean? Well, there isn't any Fuel in the drill or the furnace.
You can power them with either Wood or Coal. To collect them, you'll need to cut trees or mine coal, with right click.
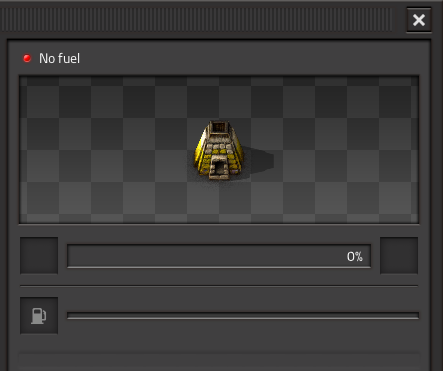
Assuming that you now have a pickaxe and have found some fuel, it's about time we went and made the furnace and drill start working for you. By left clicking on the furnace or drill, their interface will open.
To place your fuel into the machine, simply left click it to pick it up and left click again to put it into the fuel slot.
If you want to split a stack in half, so that your furnace and drill can both get half of your fuel, right click the stack in your inventory and then place it in the fuel slot. Easy as that! Now both of your machines should be running and automatically making you some iron plates! Try also CTRL-left click: this will feed half of the stack you're holding into the machine.
You can use an identical setup for copper ore to get copper plates.
Production upgrade!
You know what's better than iron plates? More iron plates! Why don't we go ahead and get them?
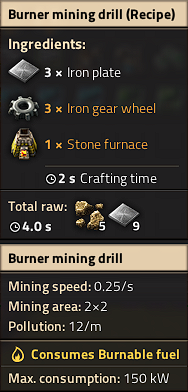
You'll need to craft some extra drills. If you hover over drill in the crafting menu, you'll see two lists of materials. The first list shows the components needed to make the drill; the second one at the very bottom of the tooltip window shows the raw resources needed to craft it. Unlike other games, you do not need to create the pre-requisite items before you select the item you want to make. All required items are crafted for you. You can see this process happening on the bottom left of the screen, where your Crafting Queue is. You can also queue up more crafting orders, as long as you have the necessary materials on you, and they'll get carried out one after the other.
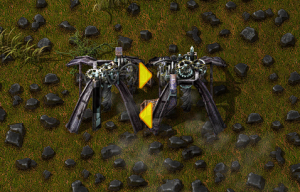
Now that you can afford some extra drill and furnaces, you should automate the acquisition of both coal and stone. These are easy to set up and work essentially the same as the iron setup. For Coal, you can have two drills facing each other: they'll run on the coal they get fed by their partner and you can collect the surplus.
Don't forget that you can collect resources from machines without opening their inventories, with CTRL-LMB. You might also want to activate the detailed view, by pressing the ALT key once. You can deactivate it by pressing ALT again.
And for stone you can have the drill output directly into a chest.
Once this is all setup up, you will probably want to make it go faster. Set up more drills with furnaces for the iron, setup some for copper and maybe lay more drills oncoal to cover for the extra fuel consumprion. In the early game, the most used resource is iron, so you'll probably need twice as many miners on iron than copper, if not more. But expect copper to become more and more important the more you mess with electricity and electronics!
More automation
Ok great, so now you have 4 or so furnaces making iron, a couple making copper, some stone production and a good amount of coal production. But you know what really sucks? having to run the coal around to all your other machines, right? Well let's automate that too! Conveyor belts and inserters are the way of the future! The output slots on the drill can also output onto conveyor belts to be transported to your other machines.
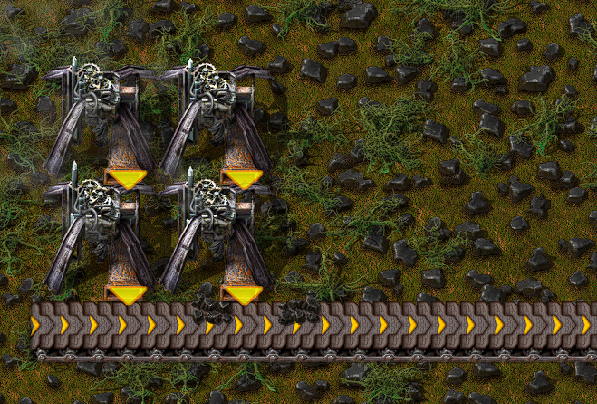
Now that we can take our coal to other places with no effort, we just need a way to input the coal into those machine.
This is what Inserters are for. You can use burner inserters as a cheap way to move items from anything to anything. You can move object from the ground, chests, machines and put them wherever you want.
Burner Inserters themselves require coal to run though, which makes this a little counter intuitive to have to fuel them instead of the machines you are trying to fuel anyway.
Here is a small example of inserters working. Notice that the flat line is where the inserters will pick up from, and the arrow is where they will place the item.

Ok great, so now we know how to automatically mine things and then how to automatically move things from one place to another, and then to place said items into machine or out of machines.
Next up we want to get some electricity so that we can have inserters that run of that instead of fuel.
Electrical power
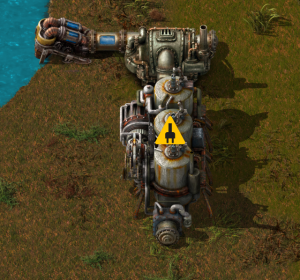
Electricity. This is where things start to get interesting. We're going to need a single offshore pump, some boilers and a steam turbine. These are really simple to set up, they just require twenty-some iron plates and 5 stone per boiler. The offshore pump goes in the water and needs no power to run. From there, you can either use pipes to transport the water to boilers, or you can run boilers straight from the pump. Boilers allow water to flow through them just like pipes do, except they also heat the water along the way and cannot be used as corners. The pipes or the boilers then connect to the middle of the short side of the steam engine. Make sure you connect it in the right place or it won't work. Moreover, steam engines allow water to run through them just like boilers, so you can have as many turbines as you want connected in a row. Here is a small example.
Now you need to use power poles to carry power to your machines. Place some down so that their coverage area (the blue square) overlaps each turbine in at least one square. If they are going to connect, the machines that use power will be shown with a blue outline around their edges.
If the turbine is producing power but nothing is using it, it'll show a yellow flashing icon: right now it's showing because we don't have electric machines yet!
Your power setup can look however you want it to look.
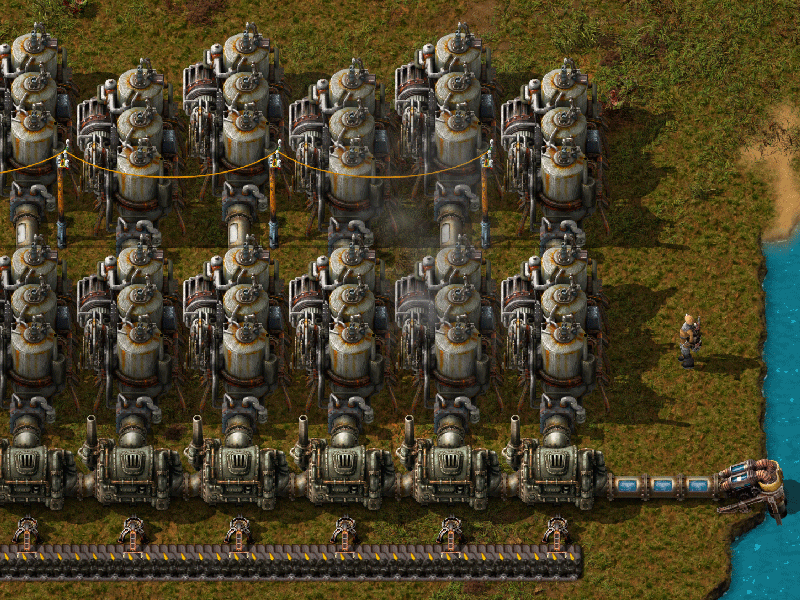
A great method is to have a line of boilers that supply a certain amount of turbines with hot water, and then you can use transport belts to bring coal to them for inserters to place inside them so that your electricity is always running.
The most often used setup is 1 offshore pump, 14 boilers and 10 steam engines. This is due to this being the best ratio between the 3 of them. 1 pump produces enough water for 10 engine, and the 14 boilers is sufficient to heat the water for that many. The example above is easily expanded into this efficient design. But hey, this game is all about experimentation and for you to be able to find ways to do your own things! So get to it, and show off your own unique designs!
Using this power is as simple as creating a machine that runs on electricity and placing a power pole close enough to it that the blue square touches the machine, just like you have to do at the power plant with the engines. Make sure that there is a line of power poles that actually connect to your power plant.
Now that power is explained, we need to increase our resource production.
However, if you want detailed info on your power production/consumption, you can check the Detailed Electric Network Info, opened by clicking on any powerpole.
Re-thinking our resources and research
Next we really want to get onto automation of items, not just the smelting of ores.
Before we can get to that though, we're going to have increase our production of ores. This is where things start becoming a little tricky and there are few things you want to do at once. We really want to be able to set the factory to make things and let it go. But for that we need some extra utilities which we don't have and need to get through research.
We haven't even touched on that yet! lets start by ramping up our resource production. Now that we have electricity, we can use Electric Mining Drills. These are much better than those scummy Burner ones. They work exactly the same except they are twice as fast and they don't rely on fuel, as you could guess by the names. You can have them to output your raw resources onto belts and get them to a place where you can mass process the ores into plates. Here is a small example of what you could do, but let your imagination and your calculating logic figure out other, maybe even better ways of doing it! You want ore to be split more or less evenly on each side of the belts. This helps with the amount of resources that can be carried to your base of operations on a single belt.
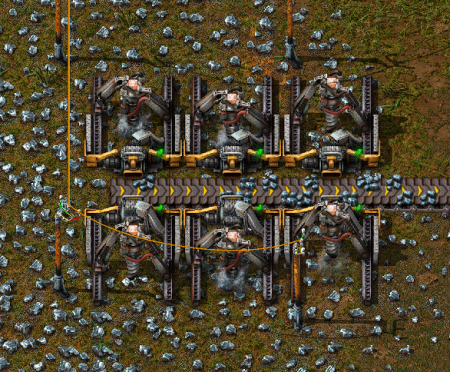
This is once again easily expandable all over an iron deposit. This conveyor belt can then take all of the ore to some sort of processing area. The processing area needs some machines that we currently don't have due to limitations in our research.
Most importantly, we want the long handed inserter. This inserter is able to reach twice as far as a normal inserter! It is very useful for bringing or placing items to or from conveyor belts that are one extra tile away. So what we need to do is to make some science labs. They don't cost too many resources, but take a little while to make. Craft one or two of them and connect them to power. When you first place one, you are going to get a popup asking you want you want to research. We really want automation right now. This gives us our inserters and the Assembling machine 1, which is going to be very useful in the near future.
You'll notice that the cost for this is 10 Science Pack 1's, or "red potions" or "flasks" as some people like to call them. These are simply another crafted item, which you should craft 10 of now and place them in your labs to begin researching. While you are waiting for your flasks to craft or your research to complete, lets continue building an ore processing center. We want a line of copper, iron and coal to be available for this area. Despite being in the electric era, our furnaces still need coal until a little further down the line.
Below is another sample of how you could set up your area. There are efficient ways of making them that you might see on the forum, but if you want to learn about what they are and how they work, you can either experiment yourself or search the wiki/forum for some better designs.
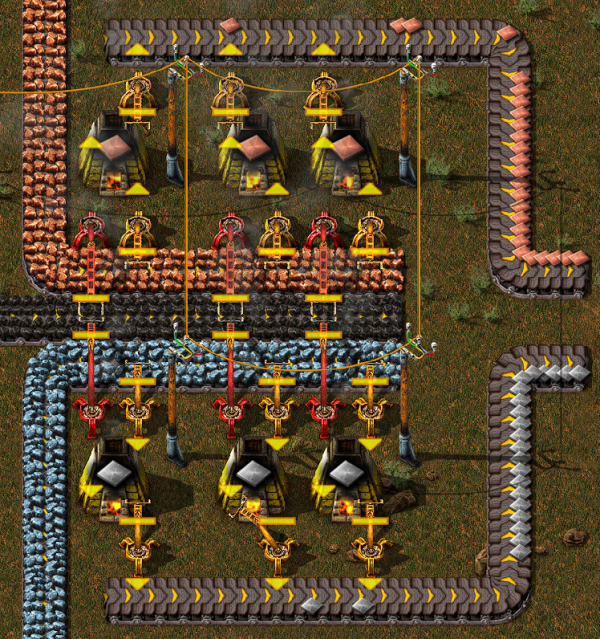
As per usual, I leave this area with plenty of room to expand later on when demands become higher. The important parts about this is that you need the red, long handed inserters to be able to reach the coal in the middle to fuel your furnaces. You need seperate belts for your incoming raw materials to be able to be processed, and then another belt outside of them to handle the output after they have been smelted. These materials can then go straight into your base to be made into a myriad of other things. Finally, we have a steady and upgradeable supply of copper and iron plates, and we can get into further automation with the assembling machines so we can automate creation of things like Science Packs, Ammunition and every other item that the player themselves can craft, but without you involved at all!
Automating that research
Ok, so a fair amount has happened. Now, to be able to progress into later parts of the game with better research we are going to want automate the process of making science packs and putting them into the labs. This way we won't have to worry about research any longer.
There are many designs that you can find on the forums, but I'll show you something simple, letting you find what works for you. I would highly recommend that you research Logistics as your next research, and in fact manually craft the science required for this. The logistic research gives you some important things: the splitter, the underground belt and the fast inserter. The splitter and underground belts are some of the most important items you'll get at this stage. They do pretty much what their names imply.
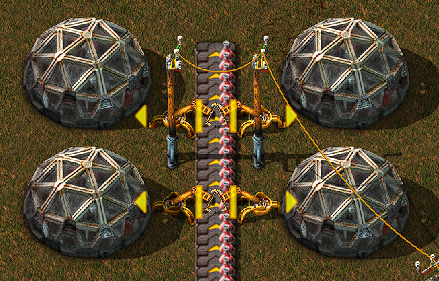
So what do science packs require? We need copper plates and iron gears. So far we have only dealt with raw resources, how do we make craftable things? The Assembler answers your prayers! If you place an assembler down and open its interface, it asks you what you would like it to craft. Once you select one, if you put the ingredients in that it requires it will craft the item and you can pull out the finished product. In the case of red science packs, we will need an assembler making iron gears, and an assembler making the actual packs. A nice way of doing this is to have a conveyor belt with 1 side containing the copper plates and the other side taking the gears from another assembler like below.
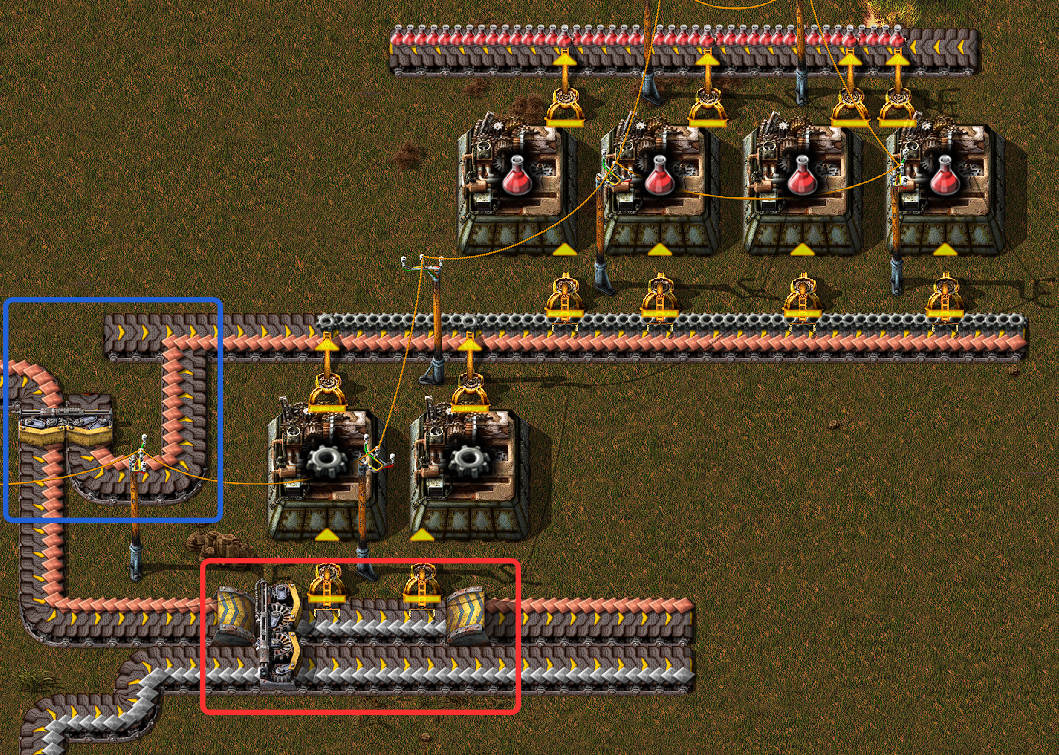
Now this picture uses a few neat little tricks that I will explain in detail. If you have your plate belts seperate, and you want them running side by side there can be issues with trying to grab one or the other resources from the far belt. Yes, you could use a long inserter, but in some cases you don't want this (e.g. you need a fast inserter to get resources quickly into your assemblers).
The area in red is a good way to get around this. By having a splitter, you can move the far belt from your production in close while also allowing it to continue down the line for later use. For the copper, we use an underground belt to go underneath the area that is now taken by the far line which also allows the copper to continue on. Once again, this is only one possible method of doing things and you are in no way obligated to follow it.
The area in blue is a quick way to allow copper to continue down the main line, while also splitting some off for our red science assemblers. Notice how when it joins the line that the gears are on, they only join the bottom side of the belt. The little extra belt that I added to the left stops the belt from becoming a turn, and therefore makes the items only join the side I want them to. The rest is simple: the gears and copper get pulled into the assemblers, they make the science and then it gets pulled out again on the other side. These flasks can then be transported to some labs to automatically do your research for you, for example like this:
