Railway
For the research see Railway (research)
The Railway is one of the main transport methods in Factorio. Although the installation of such an network is sometimes complicated and takes a large amount of resources and space, it is especially over large distances more efficient and faster than belts and robot logistics.
Besides the use as transportation medium it must be said here, trains can be quite enjoyable to drive!
Railway construction, however, is not learned in an instant. It takes some time to learn the basics, such as automating transportation. Learning how to manage and upkeep a larger train network can take quite some time and a large amount of experience..
Beginner
This section covers how to build tracks. assemble trains, and get moving. This enables manual transportation over large distances using trains and covers the earliest iteration of railway tech.
- Railway/Tutorials
- Sometimes a picture/video says more than a thousand words.
- Railway/Do not cross the tracks
- A train is very fast, take care! Entering/exiting a moving train is possible, but dangerous.
- Vehicle/Train/Defence
- Defend, as trains are a priority target of Enemies.
Tracks

| Straight rail | Curved rail |- |
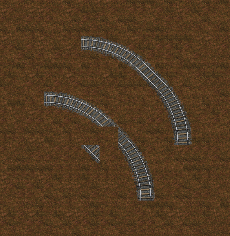
The backbone of the player's rail system has to be built out of the two basic elements (straight/curve) manually. According to FFF #113/#114 update thirteen will include a build-by-drag feature to make building tracks easier and faster.
Rails can be placed in a two-Tile area only. For the future (for example if the player makes plans for a train station, before they research trains,) it is generally a good idea to only place tracks on even tile-coordinates. The player can see the coordinates of the tile they are moving with the cursor by turning on the Debug mode, selecting "show-tiles".
Curves
To create a 90 degree two Curved rails and one Straight rail are needed. The Straight rail has to be placed along the end of a curved rail to fit the gap between the two Curved rails.
Switches
- There is no optical sign for a working switch. The player must place a Curved rail overlapping on a Straight rail (or vice versa) to form a switch. In other words: The player can create 3-way-switches at nearly every point of their track by mixing curves with straight rails.
- The crossing of two straight tracks is not usable as switch, but they do connect signal blocks making it possible to prevent collisions.
- Parallel tracks do not interact with each other and generally have no problem, however, switching from one track to the other can require extra resources because the track has to turn away from the other parallel track then turn back to it. This can create complicated networks of signals and as such the player may wish not to build parallel tracks unless they are permanent.
Other
- Use the debug-mode (Press F6) to see and understand better, how the tracks are bound together
- FFF #113 Better Rail Building: http://www.factorio.com/blog/post/fff-113
- FFF #114 Better Train Conditions: http://www.factorio.com/blog/post/fff-114
Trains

| Diesel locomotive | Cargo wagon |- |
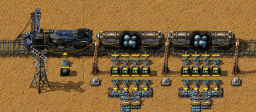
- A train is a consist of at least one locomotive, but the player may add additional locomotives to keep the train moving at max speed or Cargo wagons to transport goods with the train.
- Locomotives may be manually driven forward or backward, however, locomotives are generally much slower going backwards. Left and Right are used to change direction at switches.
- Automatic driving is only possible when a locomotive is facing towards the station the train is moving towards. This can be counteracted by having a locomotive facing either direction on a rail, or adding a loop along the rail somewhere. Note that in a loop signals can misbehave due to detecting trains before they arrived.
- A train needs fuel to drive. Fuel can be added by inserters or by using the GUI.
The locomotives' inventory is only used for Fuel. To transport items Cargo wagons have to be attached to the train. To attach a Cargo wagon, the player may either prepare to place one near an existing train- a green graphic will show the player that they will be attached, showing a connection between the train and the new wagon. Alternatively, the player may manually connect cargo wagons to trains with the stock connect key, if the cargo wagon was placed far away from a train. The cargo wagons can be filled manually or by adjacent inserters.
Advanced
This section covers items used to make trains automatically transport items between stations. The player should be familiar with the Beginner Section to fully employ these strategies.
Automated rail transportation


| Train stop |- |
- Train stop
- The item that marks the position for the locomotive to stop.
- Train Station
- The complete facility around one or more Train stops generally includes un/loading machinery, defense structures, refueling/repair installations.
Track Layout
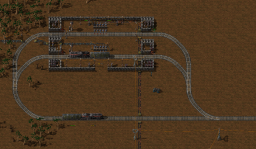
For track layout there are 2 common options on how to operate:
- Circular - higher efficiency in large networks
- Trains move only in one direction driving a circle
- requires turning loops
- extremely powerful when using a "two-track" layout, one track for each direction
- high chance of gridlocks when not signaled properly
- Linear - easier to setup, cheaper at beginning
- Trains drive in two directions on the same track
- lower cost for tracks, but minimum of 2 engines per train
- high waiting times when operating multiple trains
Train stop
- The train will search for a path to stop with the Train stop on its right hand side in driving direction
- At least two Train stops are needed to make a train drive between them. Installing a single Train stop would result in trains stopping at that station, without moving further.
Schedule
- When right-clicking on the locomotive the player can set up a schedule:
- add the desired Train stops to the route in correct order
- adjust the wait time for each Train stop individual
- to start the train, enable "automatic mode"
Troubleshooting
Train doesn't move
- Is the train fueled?
- Is the train facing the right direction?
- Is another train in the same block?
No path
- Is the track working properly?
- Is the next Train stop placed on right-hand side?
- Are signals set correctly, if any?
- Is a signal reading the location of the train before it moves?
Rail signals
| Rail signal | Rail chain signal |- |
Understanding rail signals can be difficult. Several terms critical to understanding them are below:
- Rail segment
- A piece of track (one item). There are just Straight rail and Curved rail.
- Segment
- A single path of continuous rails, a track without intersections or switches. This becomes important when Signals are employed. The player may check the number of the current segment by mousing over a segment.
- Block
- A set of segments defined by rail signals. By default every connected segment belongs to one block, no matter whether a train can drive on it or not, and even if it can be driven only in one direction (for example a joining switch: the other segment of the switch belongs to the same block!). The player can see the current block numbers of a rail piece in the info section. See also this forum post for a good explanation about blocks.
As rail signals are used to employ multiple trains in automatic mode it is said here that driving a train manually ignores most of the rules described here. Driving a train manually on an automated network is possible and other automatic trains will follow the signaling. Sometimes it will be not possible to avoid a collision for automatic trains when the player ignores red/yellow signals, so be prepared for disaster.
- The most basic rules
- There is at maximum one Train in a block at any time.
- A red signal means that the following block is occupied by a train.
- A yellow signal means that a train is approaching, and already has the approval to enter the following block.
- Rail signals separate a new block and reflect its state: green - free, yellow - to be occupied by approaching train, red - occupied
- Rail chain signals separate a new block and reflect the state of the next Rail signal
Expert
This section contains further links to in-depth knowledge. As a general advisory, tips given in this section detail the more intricate mechanics in the game and can be dangerous to the experience of players who wish to discover better methods on their own.
About Trains
- Vehicle/Train/Wagon: A wagon is like a rolling chest, but the inserters can insert into it from a slightly farther distance.
- Vehicle/Train/Driving: The player may manually drive a train, and enter the train by pressing Enter.
- Vehicle/Train/Reverse driving: How to drive a train in different directions while in automatic mode.
- Railway/Mixed transports - moving different items in wagons
- Railway/Train make-up - about how long trains should be.
- Vehicle/Train - the handling of loco and wagon
- Railway/Train path finding - how the trains find their path.
About train stations and stops
- Railway/Train stops - don't mix train stops with train stations!
- Railway/Train stations - about the loading/unloading of trains
- Railway/Automated transport - all about automated transport.
- Railway/The renaming-of-train-stop-trick: What happens if the player gives a train stop the same name as another train stop?
- Railway/Multiple trains/Single track: It is possible to operate multiple trains on one track.
About Signaling
- Railway/Signal
- Railway/Multiple trains
- Railway/Rail info - hovering a rail-segment reveals some important information
- Railway/Deadlocks
Tips & Tricks
- When supply trains follow the player: http://www.factorioforums.com/forum/viewtopic.php?f=5&t=6203
- The player may lay rails by sitting inside of the train.
Relationship to OpenTTD
Factorio's railway system works basically exactly like the block signals in Open Traffic Tycoon Deluxe. Players who have ever played that game will find some elements of it in Factorio. If not, they can learn from the openttd documentation.