|
|
| (47 intermediate revisions by one other user not shown) |
| Line 3: |
Line 3: |
|
| |
|
| ---- | | ---- |
|
| |
| {{Languages}} | | {{Languages}} |
| == 概要 ==
| | '''ベルト輸送システム(Belt transport system)'''は、アイテムを異なる場所の間で輸送するために[[player/ja|プレイヤー]]が最初に触れることとなるシステム。[[Railway/ja|列車]]、[[Logistic network/ja|物流ロボット]]と並んで、Factorioにおけるアイテム輸送システムを構成している。 |
| '''コンソール(Console)'''はFactorioのコマンドラインインターフェース。 | | (訳注:0.16現在、"transport"は搬送ベルトについてのみ「搬送」と訳され、それ以外に於いては「輸送」と訳されている。以下では固有名詞以外は「輸送」に統一する) |
| | |
| ゲーム内コンソール(in-game console)は以下に用いられる。
| |
| | |
| * 他プレイヤーとのチャット
| |
| * コマンド/スクリプト/チートの実行
| |
| * ときどきステータス更新
| |
| | |
| 以下の3種のコマンドがある。
| |
| | |
| * '''マルチプレイヤー(Multiplayer)''' - メッセージフィルタリング、ユーザBAN、などなど
| |
| * '''情報(Information)''' - ゲームに関する様々な情報を表示
| |
| * '''スクリプト/チート(Scripting/Cheating)''' - Luaスクリプト片を実行 (<span style="color:#FF0000">そのセーブで実績が無効になる</span>)
| |
| | |
| === コンソールの利用 ===
| |
| コンソール窓は{{keybinding|/}}(スラッシュ)か{{keybinding|~}}(チルダ)キーで切り替えられる。
| |
| | |
| キー設定は'''Options Menu -> Keyboard -> Toggle Lua console'''から設定可能。
| |
| コンソールが開いている間、スクリーン下部でカーソルが点滅する。メッセージやコマンドを入力して'''Return'''を押すと送信(してコンソールも閉じる)。
| |
| メッセージやコマンドプレフィックスに関するドキュメントはこのページの更に下にある。
| |
| | |
| コンソールを閉じると最後のメッセージ/コマンドだけが表示されるが、徐々に消えていく(コンソールを開き直すと即座に直近のメッセージすべてが再表示される)。
| |
| デフォルトでは、全ての実行されたコマンドは全ユーザに見える。消える時間は'''Options Menu -> Other Settings -> Message Delay'''から設定可能。
| |
| | |
| コンソールを即座に隠したい場合、コンソールを開いて'''Escape''' キーを押す(か、メッセージやコマンドを入力しないまま'''Return''')。
| |
| これはコンソールを隠すだけでなく、直近のメッセージ/コマンドすべてを隠す。
| |
| コンソールは'''/clear'''コマンドでクリアできる。
| |
| | |
| コンソールはゲームコマンド(game command)同様、生Luaコードも受け付けることを覚えておこう。
| |
| | |
| === コンソール履歴 ===
| |
| | |
| コンソールは備え付けの履歴を持つ。ややテキストエディタっぽく、一度に1行のテキストしか表示されない。
| |
| | |
| {{keybinding|↑}}と{{keybinding|↓}}キーで履歴内を移動。
| |
| | |
| {{keybinding|←}}と{{keybinding|→}}キーで現在表示している編集(削除、挿入など)対象のメッセージやコマンド内でカーソルを移動、ならびに再送信('''Return'''を押す)。
| |
| | |
| {{keybinding|Tab}}キーはコマンドやプレイヤーIDをオートコンプリートする。
| |
| | |
| == マルチプレイヤーチャット ==
| |
| | |
| 特定のプレイヤーにプライベートメッセージを送るには'''/whisper''' (または'''/w'''):
| |
| <syntaxhighlight lang="lua">
| |
| /whisper <playerId> <message>
| |
| </syntaxhighlight>
| |
| | |
| 最後にプライベートメッセージを受け取ったプレイヤーに返信するには'''/reply''' (または'''/r'''):
| |
| <syntaxhighlight lang="lua">
| |
| /reply <message>
| |
| </syntaxhighlight>
| |
| | |
| グループチャットは以下のように機能する:
| |
| <syntaxhighlight lang="lua">
| |
| hello my team!
| |
| </syntaxhighlight>
| |
| <syntaxhighlight lang="lua">
| |
| /s hello all players!
| |
| /shout same as /s
| |
| </syntaxhighlight>
| |
| | |
| これらはメインのチャット機能にすぎない。プレイヤーのBAN、無視、ミュートなどのオプションもある。完全なリストはコンソールで'''/help'''。
| |
| | |
| == コマンド ==
| |
| 利用可能なコマンドのリストを見るには、コンソールで'''/help''' (または'''/h''')を入力。
| |
| 利用可能なコマンドはFactorioのバージョンとゲームセットアップに依る。
| |
| <syntaxhighlight lang="lua">
| |
| /help
| |
| </syntaxhighlight>
| |
| | |
| [https://forums.factorio.com/viewtopic.php?f=3&t=32248 Factorio 0.14.4以降]では、'''/help'''コマンドは単にコマンドのリストを表示するだけである。コマンドの完全な詳細を得るにはコマンド名(スラッシュを除く)を'''/help''' (または'''/h''')の後に加える。例えば、 '''/evolution'''コマンドのヘルプは:
| |
| <syntaxhighlight lang="lua">
| |
| /h evolution
| |
| </syntaxhighlight>
| |
| | |
| === スクリプト/チートコマンド ===
| |
| コンソールからLuaスクリプトを実行できる。
| |
| 任意のコマンドラインインターフェースやブラウザのJavaScriptコンソールに類似した挙動をする。
| |
| | |
| これは非常に強力な機能で、チートもでき、なのでスクリプトコマンドを使用した瞬間<span style="color:#FF0000">実績はそのセーブに対して永続的に無効化される</span>。
| |
| | |
| スクリプトを実行するには、'''/command''' (または'''/c''')を前置する。例えば:
| |
| <syntaxhighlight lang="lua">
| |
| /c game.player.print 'hello me!'
| |
| </syntaxhighlight>
| |
| | |
| マルチプレイヤーゲームでは、adminのみがコマンドを利用可能で、コマンドは他の全プレイヤーにechoする。
| |
| | |
| マルチプレイヤーのserver adminは(RCON/server consoleからのみ)'''/c'''の代わりに'''/silent-command''' を用いることで、他のプレイヤーにechoされるのを防ぐことができる。
| |
| <syntaxhighlight lang="lua">
| |
| /silent-command game.player.print 'only admins can use (and see) silent commands'
| |
| </syntaxhighlight>
| |
| | |
| Mod製作者もまた、特別なコマンド'''/measured-command'''を利用可能。これは'''/c'''に似ているが、実行時間を測定する。
| |
| スクリプトのパフォーマンスチューニングにとても便利。
| |
| <syntaxhighlight lang="lua">
| |
| /measured-command game.player.print 'how much time does this take to run?'
| |
| </syntaxhighlight>
| |
| | |
| 「スクリプトレット(scriptlets)」をコンソールにペーストする際、改行は無視される。
| |
| つまり、エディタではヒューマンリーダブルな形式で書いておいてコンソールにコピペできるので、理解と編集がちょっと楽になる。
| |
| | |
| == 基本的なコマンドと例 ==
| |
| | |
| === 大きいスクリーンショット ===
| |
| | |
| HD画質のスクリーンショットを取る方法は以下。
| |
| | |
| ファイルはmodsフォルダ同様、[[application directory/ja]]の「script-output」と呼ばれるフォルダに置かれる。
| |
| 画像はとても巨大になりうる。
| |
| <syntaxhighlight lang="lua">
| |
| /c game.take_screenshot{<parameter>=<value>,...}
| |
| </syntaxhighlight>
| |
| | |
| このコマンドは以下のパラメータを取る。
| |
| | |
| * showgui - Boolean値、 trueかfalse。 TrueならGUIがスクリーンショットに含まれる。
| |
| * resolution - xとyを{x = ''<x-size>'', y = ''<y-size>''}の形式で取る。
| |
| * show_entity_info - Boolean値、 Trueならalt infoがスクリーンショットに含まれる。
| |
| * zoom - ズームレベル。1は通常、2はエリアの半分にズームイン、0.5は倍のエリアにズームアウト、など。
| |
| | |
| 例として、以下は1000x1000のスクリーンショットをalt-modeをONにして、でもGUIは表示せず、ズームレベル2で撮る。
| |
| <syntaxhighlight lang="lua">
| |
| /c game.take_screenshot{resolution = {x = 1000, y = 1000}, zoom = 2, show_entity_info = true}
| |
| </syntaxhighlight>
| |
| | |
| === 計算機として使う ===
| |
| <syntaxhighlight lang="lua">
| |
| /c game.player.print(1234*5678)
| |
| </syntaxhighlight>
| |
| | |
| === 高速に掘削 ===
| |
| <syntaxhighlight lang="lua">
| |
| /c game.player.force.manual_mining_speed_modifier=1000
| |
| </syntaxhighlight>
| |
| | |
| === 高速に製作 ===
| |
| <syntaxhighlight lang="lua">
| |
| /c game.player.force.manual_crafting_speed_modifier=1000
| |
| </syntaxhighlight>
| |
| | |
| === 全研究をアンロックし研究済みに ===
| |
| <syntaxhighlight lang="lua">
| |
| /c game.player.force.research_all_technologies()
| |
| </syntaxhighlight>
| |
| | |
| 次節のコマンドでUndo。
| |
| | |
| === 全研究を未研究に ===
| |
| 手動で適用されたボーナスはリセットされない。
| |
| <syntaxhighlight lang="lua">
| |
| /c for _, tech in pairs(game.player.force.technologies) do
| |
| tech.researched=false
| |
| game.player.force.set_saved_technology_progress(tech, 0)
| |
| end
| |
| </syntaxhighlight>
| |
| === 強さリセット ===
| |
| キル数、生産統計、技術、ボーナス、マップ状況を含む強さを全リセットする。
| |
| <syntaxhighlight lang="lua">
| |
| /c game.player.force.reset()
| |
| </syntaxhighlight>
| |
| | |
| === 通常よりズームアウトする ===
| |
| ズームアウトしすぎるとパフォーマンスに問題を起こしかねないので注意。
| |
| <syntaxhighlight lang="lua">
| |
| /c game.player.zoom=0.1
| |
| </syntaxhighlight>
| |
| | |
| === プレイ時間 ===
| |
| 何時間何分何秒プレイしたか教えてくれる。
| |
| <syntaxhighlight lang="lua">
| |
| /time
| |
| </syntaxhighlight>
| |
| | |
| == インベントリ操作 ==
| |
| | |
| === 資源の補充(油、鉄など) ===
| |
| ゲーム内の資源タイルにマウスオーバーした状態で
| |
| <syntaxhighlight lang="lua">
| |
| /c game.player.selected.amount=7500
| |
| </syntaxhighlight>
| |
| | |
| === プレイヤーのインベントリにアイテム追加 ===
| |
| iron-plateの部分を欲しいアイテムの内部名称に置換して使うべし。
| |
| <syntaxhighlight lang="lua">
| |
| /c game.player.insert{name="iron-plate", count=100}
| |
| </syntaxhighlight>
| |
| | |
| 例えば、エネルギーシステムのgod-modeインタフェースは以下。
| |
| <syntaxhighlight lang="lua">
| |
| /c game.player.insert{name="electric-energy-interface"}
| |
| </syntaxhighlight>
| |
| | |
| 装備品付きで強力アーマーゲットだぜ。
| |
| <syntaxhighlight lang="lua">
| |
| /c local player = game.player
| |
| player.insert{name="power-armor-mk2", count = 1}
| |
| local p_armor = player.get_inventory(5)[1].grid
| |
| p_armor.put({name = "fusion-reactor-equipment"})
| |
| p_armor.put({name = "fusion-reactor-equipment"})
| |
| p_armor.put({name = "fusion-reactor-equipment"})
| |
| p_armor.put({name = "exoskeleton-equipment"})
| |
| p_armor.put({name = "exoskeleton-equipment"})
| |
| p_armor.put({name = "exoskeleton-equipment"})
| |
| p_armor.put({name = "exoskeleton-equipment"})
| |
| p_armor.put({name = "energy-shield-mk2-equipment"})
| |
| p_armor.put({name = "energy-shield-mk2-equipment"})
| |
| p_armor.put({name = "personal-roboport-mk2-equipment"})
| |
| p_armor.put({name = "night-vision-equipment"})
| |
| p_armor.put({name = "battery-mk2-equipment"})
| |
| p_armor.put({name = "battery-mk2-equipment"})
| |
| </syntaxhighlight>
| |
| | |
| === チートモード ===
| |
| 無限・無料製作。trueをfalseにすれば無効化。
| |
| <syntaxhighlight lang="lua">
| |
| /c game.player.cheat_mode=true
| |
| </syntaxhighlight>
| |
| | |
| == ワールド操作 ==
| |
| | |
| === プレイヤー周辺のマップを確認 ===
| |
| | |
| [[radar/ja|レーダー]]風にプレイヤー周辺のマップを確認。 | |
| <syntaxhighlight lang="lua">
| |
| /c local radius=150
| |
| game.player.force.chart(game.player.surface, {{game.player.position.x-radius, game.player.position.y-radius}, {game.player.position.x+radius, game.player.position.y+radius}})
| |
| </syntaxhighlight>
| |
| もしくはスタートポジションから
| |
| <syntaxhighlight lang="lua">
| |
| /c game.forces.player.chart(game.player.surface, {{x = -2000, y = -2000}, {x = 2000, y = 2000}})
| |
| </syntaxhighlight>
| |
| 150は好きな半径に変更して構わない。大きくすればするほど時間食うけど。
| |
| | |
| 確認されたマップが大きくなるとセーブファイルのサイズも増える。以下のコマンドで現在キューされているチャンク生成をすべてキャンセルし 0,0 周辺の半径32チャンク以外を除去する。
| |
| 当該チャンク内のプレイヤーのものも除去される事に注意。
| |
| <syntaxhighlight lang="lua">
| |
| /c local surface = game.player.surface;
| |
| game.player.force.cancel_charting(surface);
| |
| local chunk_radius = 32;
| |
| for chunk in surface.get_chunks() do
| |
| if (chunk.x < -chunk_radius or chunk.x > chunk_radius or chunk.y < -chunk_radius or chunk.y > chunk_radius) then
| |
| surface.delete_chunk(chunk)
| |
| end
| |
| end
| |
| </syntaxhighlight>
| |
| | |
| === 夜をオフ ===
| |
| 沈まない太陽。
| |
| <syntaxhighlight lang="lua">
| |
| /c game.player.surface.always_day=true
| |
| </syntaxhighlight>
| |
| | |
| === ゲーム速度変更 ===
| |
| 0.5で速度半分、1でデフォルト、2で倍速、など。最小は0.01。完了に長い期間待たなければならない場合など、様々なことに利用できる。大きくするとパフォーマンスが落ちるので注意せよ。
| |
| <syntaxhighlight lang="lua">
| |
| /c game.speed=X
| |
| </syntaxhighlight>
| |
| | |
| === 高コスト(マラソン)かノーマルモードか ===
| |
| ノーマルから高コストモードプリセットに切り替える(研究コストと中間生成物の製作コストを変更)。
| |
| <syntaxhighlight lang="lua">
| |
| /c game.difficulty_settings.recipe_difficulty=1
| |
| game.difficulty_settings.technology_difficulty=1
| |
| game.difficulty_settings.technology_price_multiplier=4
| |
| </syntaxhighlight>
| |
| | |
| ノーマルに戻す。
| |
| <syntaxhighlight lang="lua">
| |
| /c game.difficulty_settings.recipe_difficulty=0
| |
| game.difficulty_settings.technology_difficulty=0
| |
| game.difficulty_settings.technology_price_multiplier=1
| |
| </syntaxhighlight>
| |
| | |
| === 凍れる時間の秘法 ===
| |
| 「BOOL」を「true」にすれば時間の進行が止まる。凍結解除には「false」にする。
| |
| <syntaxhighlight lang="lua">
| |
| /c game.player.surface.freeze_daytime=BOOL
| |
| </syntaxhighlight>
| |
| | |
| === 汚染を全除去 ===
| |
| <syntaxhighlight lang="lua">
| |
| /c game.player.surface.clear_pollution()
| |
| </syntaxhighlight>
| |
| | |
| === 友軍へのフレンドリーファイアを無効化 ===
| |
| <syntaxhighlight lang="lua">
| |
| /c game.player.force.friendly_fire = false
| |
| </syntaxhighlight>
| |
| | |
| === 新たな資源パッチを追加 ===
| |
| プレイヤーキャラクターを中心に11x11の新たな資源パッチを生成。
| |
| パッチは完全な正方形だが、埋蔵量は自然生成と同様にランダムで中心部は多くの資源がある。
| |
| デフォルトでは2500-3000鉱石となる。
| |
| | |
| より大きなパッチが欲しいなら、「local size = 5」をより大きな数字に変更。
| |
| 大きなパッチは指数的に多くの鉱石を含む。
| |
| 30以上の数字は推奨できない。
| |
|
| |
|
| より潤沢なパッチが欲しいなら、「local density = 10」をより大きな数字に変更。
| | ベルトは特にアイテムの搬送に用いられ、エネルギーを使わずに稼働する。ベルトは他の動くエンティティ、例えば[[player/ja|プレイヤー]]、[[vehicle/ja|乗り物]]や[[enemies/ja|バイター]]とも干渉でき、動きを速めたり遅めたりする。 |
| 大きすぎる数字を入れても害はないが、100以上が必要なことはまずないだろう。
| |
|
| |
|
| 生成される資源を選ぶには、下の方の「stone」を「iron-ore」「copper-ore」「coal」「uranium-ore」に変更。
| | == 搬送ベルトの種類 == |
|
| |
|
| <syntaxhighlight lang="lua">
| | 以下はFactorioで利用できる搬送ベルト全てのチャート。 |
| /c local surface=game.player.surface
| |
| local ore=nil
| |
| local size=5
| |
| local density=10
| |
| for y=-size, size do
| |
| for x=-size, size do
| |
| a=(size+1-math.abs(x))*10
| |
| b=(size+1-math.abs(y))*10
| |
| if a<b then
| |
| ore=math.random(a*density-a*(density-8), a*density+a*(density-8))
| |
| end
| |
| if b<a then
| |
| ore=math.random(b*density-b*(density-8), b*density+b*(density-8))
| |
| end
| |
| surface.create_entity({name="stone", amount=ore, position={game.player.position.x+x, game.player.position.y+y}})
| |
| end
| |
| end
| |
| </syntaxhighlight>
| |
|
| |
|
| === 油パッチを追加 === | | {| class="wikitable" |
| 3x3の9原油パッチを生成。
| | ! [[Transport belts/ja|搬送ベルト]] !! [[Underground belts/ja|地下搬送ベルト]] !! [[Splitters/ja|分配器]] !! 最大スループット(アイテム毎[[game-second/ja|秒]]) !! 必要研究 !! 原材料(ベルト1つあたり) |
| <syntaxhighlight lang="lua"> | | |- |
| /c for y=0,2 do | | | {{Imagelink|Transport belt|Transport belt/ja|搬送ベルト}} |
| for x=0,2 do
| | | {{Imagelink|Underground belt|Underground belt/ja|地下搬送ベルト}} |
| game.player.surface.create_entity({name="crude-oil", amount=5000, position={game.player.position.x+x*7-7, game.player.position.y+y*7-7}})
| | | {{Imagelink|Splitter|Splitter/ja|分配器}} |
| end
| | | 13.333 |
| end
| | | [[Logistics (research)/ja|物流学1]]<sup>1</sup> |
| </syntaxhighlight>
| | | {{Icon|Time|1}} + {{Icon|Iron plate|3}} |
| | |- |
| | | {{Imagelink|Fast transport belt|Fast transport belt/ja|高速搬送ベルト}} |
| | | {{Imagelink|Fast underground belt|Fast underground belt/ja|高速地下搬送ベルト}} |
| | | {{Imagelink|Fast splitter|Fast splitter/ja|高速分配器}} |
| | | 26.666 |
| | | [[Logistics 2 (research)/ja|物流学2]] |
| | | {{Icon|Time|3.5}} + {{Icon|Iron plate|11.5}} |
| | |- |
| | | {{Imagelink|Express transport belt|Express transport belt/ja|超高速搬送ベルト}} |
| | | {{Imagelink|Express underground belt|Express underground belt/ja|超高速地下搬送ベルト}} |
| | | {{Imagelink|Express splitter|Express splitter/ja|超高速分配器}} |
| | | 40.0 |
| | | [[Logistics 3 (research)/ja|物流学3]] |
| | | {{Icon|Time|9}} + {{Icon|Iron plate|31.5}} + {{Icon|Lubricant|20}} |
| | |- |
| | |} |
|
| |
|
| もしくは、干渉が生じないようにランダムにするには
| | (1) 地下搬送ベルトと分配器のみ。ノーマル搬送ベルトはゲーム開始時から利用可能。 |
| <syntaxhighlight lang="lua">
| |
| /c local position=nil
| |
| for i=1,9 do
| |
| position=game.player.surface.find_non_colliding_position("crude-oil", game.player.position, 0, i/2+1.5)
| |
| if position then
| |
| game.player.surface.create_entity({name="crude-oil", amount=5000, position=position})
| |
| end
| |
| end
| |
| </syntaxhighlight>
| |
|
| |
|
| === エンティティをカウント ===
| | ベルト階級にかかわらず、ぎっしり詰まった搬送ベルトは6~8アイテムを保持できる。詳細は[[Transport_belts/Physics/ja|搬送ベルトの物理]]参照。 |
| local entityに格納されたstringを名前に含むエンティティ全てを数える。
| |
| <syntaxhighlight lang="lua">
| |
| /c local entity="belt" | |
| local surface=game.player.surface
| |
| local count=0
| |
| for key, ent in pairs(surface.find_entities_filtered({force=game.player.force})) do
| |
| if string.find(ent.name,entity) then
| |
| count=count+1
| |
| end
| |
| end
| |
| game.player.print(count)
| |
| </syntaxhighlight>
| |
|
| |
|
| === 全パイプ・地下パイプを空にする === | | == ベルトの階級(Tier) == |
| パイプに入ってほしくない流体が入ってしまったとき便利。
| |
| <syntaxhighlight lang="lua">
| |
| /c local surface = game.player.surface
| |
| local deleted=0
| |
| for key, entity in pairs(surface.find_entities_filtered({force=game.player.force})) do
| |
| if string.find(entity.name, "pipe") then
| |
| for i=1,#entity.fluidbox do
| |
| deleted = deleted + 1
| |
| entity.fluidbox[i] = nil;
| |
| end
| |
| end
| |
| end
| |
| game.player.print("Pipes emptied: "..deleted)
| |
| </syntaxhighlight>
| |
|
| |
|
| == 敵/進化 ==
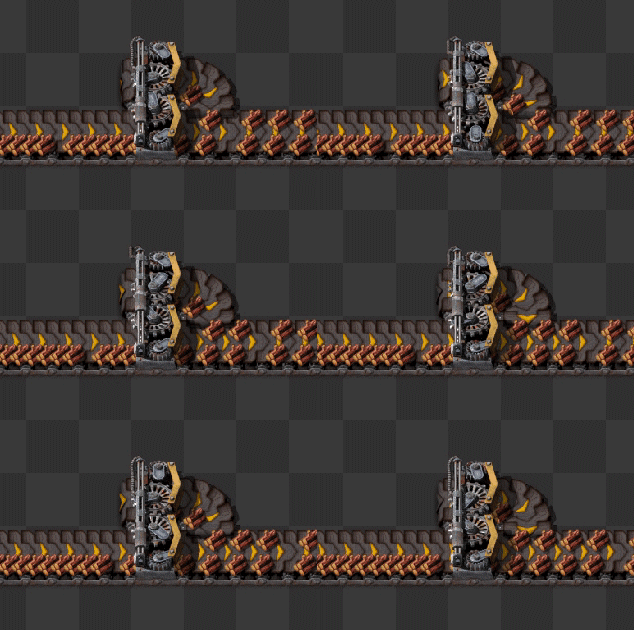
| | [[File:Transport_belts_speed.gif|300px|thumb|top|3種のベルトとその速度(上から順に: 通常ベルト、高速ベルト、超高速ベルト)]] |
| === バイターがどのくらい進化したか確認 ===
| | 3種類の階級のベルトが使える。[[transport belt/ja|搬送ベルト]]は黄色くて一番遅いが、同時に一番製造コストが安い。次の階級は赤い[[fast transport belt/ja|高速搬送ベルト]]で、通常の2倍速。[[express transport belt/ja|超高速搬送ベルト]]は最も階級が高く、青色で通常の3倍、もしくは赤ベルトの1.5倍。 |
| "/c"で始まらないコマンドは実績を無効化しないことに気をつけよう。
| | {{clear}} |
| <syntaxhighlight lang="lua">
| |
| /evolution | |
| </syntaxhighlight>
| |
|
| |
|
| === 進化ファクター(evolution factor)をセット === | | == ベルト機構 == |
| 範囲は0(ゲーム開始時)から1。
| |
| <syntaxhighlight lang="lua">
| |
| /c game.forces["enemy"].evolution_factor=X
| |
| </syntaxhighlight>
| |
|
| |
|
| === 時間に依る進化を無効化しつつ汚染に依る進化を加速 === | | === ベルトの合流・分岐 === |
| <syntaxhighlight lang="lua">
| |
| /c game.map_settings.enemy_evolution.time_factor=0
| |
| /c game.map_settings.enemy_evolution.pollution_factor=game.map_settings.enemy_evolution.pollution_factor*2
| |
| </syntaxhighlight>
| |
|
| |
|
| 最後の「2」はデフォルト汚染ファクターの倍加。他の数字に変えれば汚染ファクターをもっと大きく(小さく)できる。
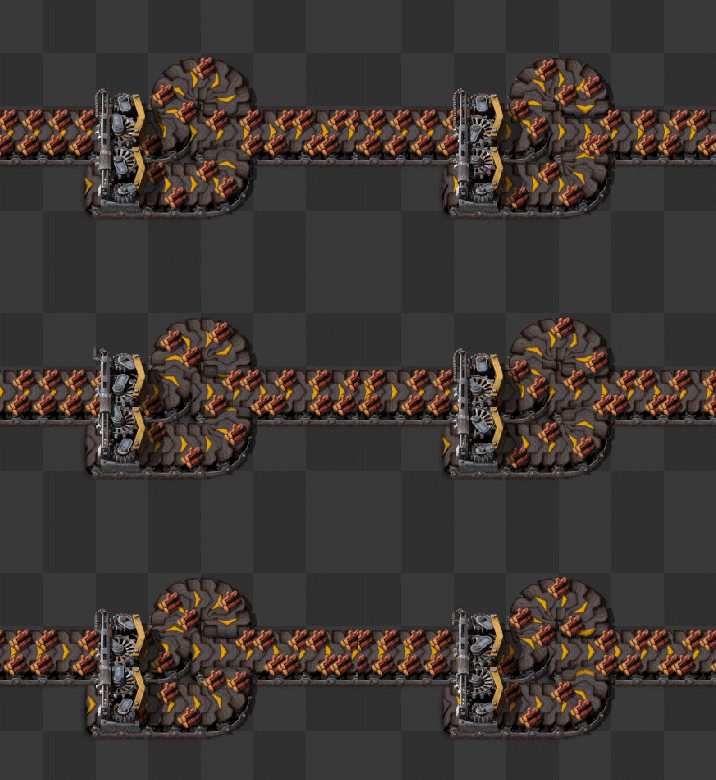
| | どの階級のベルトも、アイテムが載るレーンを2つ持つ。一種類の素材を2つ流すことも、2つの異なる素材を同じベルトに流すこともできる。混合ベルトは鉱石の精錬や、[[high tech science pack/ja|ハイテクサイエンスパック]]のように多くの異なる原料を要求するアイテムを製造するのに便利。混合ベルトは分配器フィルタで分離できる。地下ベルトは片方を通さないので、地下ベルトを用いて分離することもできる。 |
|
| |
|
| === 「敵」軍バイターを全滅させる ===
| | [[File:Transport_belts_2_lanes.gif|top]] [[File:Transport_belts_unmerge.gif|300px|top]] |
| 機動部隊とワームだけを殺し、巣は殺されないことに注意。
| |
| <syntaxhighlight lang="lua">
| |
| /c game.forces["enemy"].kill_all_units()
| |
| </syntaxhighlight>
| |
|
| |
|
| === 敵を鏖殺 ===
| | 合流/分離はよく[[splitter/ja|分配器]]で行われる。2番めのgifに見られる小技については、'''[[Belt_transport_system#ベルトレーン分岐|地下ベルト]]'''節に詳しい。 |
| バイター、ワーム、基地すべてを殺す。敵であるものすべてが完全に殲滅される。探査済みの世界に存在する敵にのみ影響し、マップの未探索で生成されていない部分にはまだ敵がいる。
| |
| <syntaxhighlight lang="lua">
| |
| /c local surface=game.player.surface | |
| for key, entity in pairs(surface.find_entities_filtered({force="enemy"})) do
| |
| entity.destroy()
| |
| end
| |
| </syntaxhighlight>
| |
|
| |
|
| === ピースフルモード有効化 === | | === レーンバランシング === |
| ピースフルモード(Peaceful mode)ではバイターが自発的に攻撃しない。falseをtrueにすれば無効化。
| |
| <syntaxhighlight lang="lua">
| |
| /c game.player.surface.peaceful_mode=true
| |
| </syntaxhighlight>
| |
|
| |
|
| === バイターの戦線拡大を無効化 ===
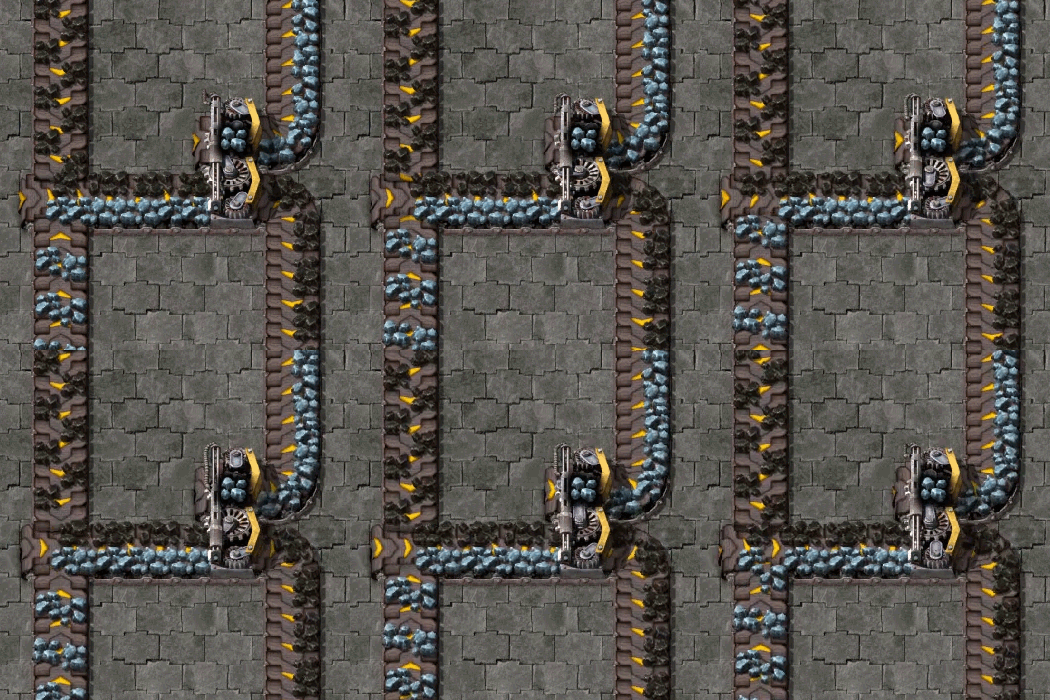
| | [[inserters/ja|インサータ]]のベルトへのアイテムの置き方が原因で、レーンが偏ってしまうことがある。スループットを維持するには、レーンバランシングが不可欠だ。以下のgifでは2つのやり方を示す。前者は、最初に1レーンのみが使われている場合のみ機能する。原理についての詳細は、[[Balancer mechanics/ja#レーンバランサ]]を見よ。 |
| バイターが新たな巣を作らなくなる。
| |
| <syntaxhighlight lang="lua">
| |
| /c game.map_settings.enemy_expansion.enabled=false | |
| </syntaxhighlight>
| |
|
| |
|
| == プレイヤーキャラクター ==
| | [[File:Transport_belts_balance1.gif|top]] [[File:Transport_belts_balance2.gif|top]] |
| プレイヤーに直接的に関わるコマンド。
| |
| === プレイヤーの位置を取得 ===
| |
| 現在座標を表示。
| |
| <syntaxhighlight lang="lua">
| |
| /c game.player.print(game.player.position.x .. ", " .. game.player.position.y)
| |
| </syntaxhighlight>
| |
|
| |
|
| === テレポート === | | === ベルトスループット === |
| プレイヤーを指定した場所に移動。前述したコマンドでプレイヤー座標を取得すれば、特定のプレイヤーにテレポートできる。
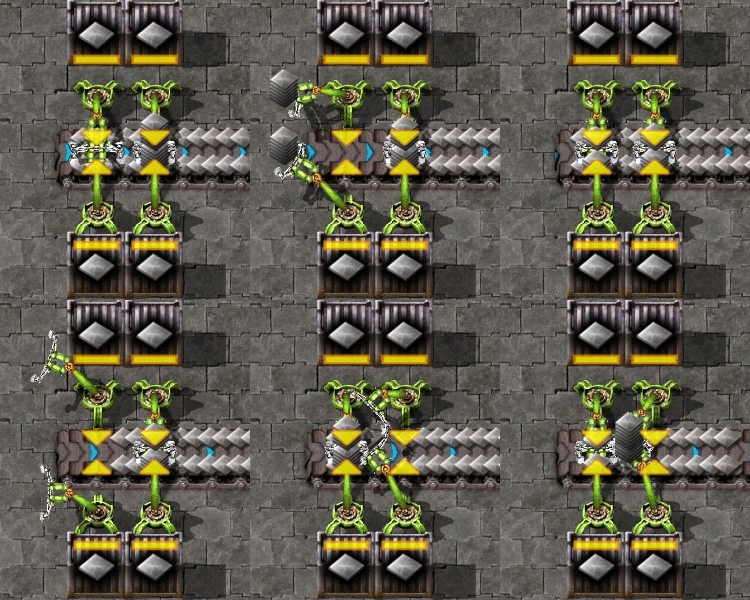
| | [[File:Stack inserters fill express belt.gif|frame|right|[[stack inserter/ja|スタックインサータ]]4つで超高速ベルトを満載できる。左の2つはスタックサイズ12、右の2つはスタックサイズ7。]] |
| <syntaxhighlight lang="lua">
| | スループットの最大化は、ベルトを効率化するために重要である。そのため、いくつかの定義を導入しよう。 |
| /c game.player.teleport({X, Y}) | |
| </syntaxhighlight>
| |
|
| |
|
| 世界の原点にテレポートするなら座標は0,0。
| | ; 速度(Speed) |
| | : ベルトがどれほど速く動くか。 |
| | ; 密度(Density) |
| | : アイテムがどれほどぎっちりベルトに載せられているか。 |
| | ; スループット(Throughput) |
| | : 速度×密度。所与の時間において、どれほど多くのアイテムが通過するかを表す。 |
|
| |
|
| === プレイヤーの色を変更 ===
| | では、スループットを拡張しうる3つの可能性を見ていこう。 |
| "/c"で始まらないコマンドは実績を無効化しないことに気をつけよう。 COLORを色の名前で置換せよ。利用可能な色は以下。Black, blue, brown, cyan, gray, green, orange, pink, purple, red, white, acid, yellow。 色は[[:Wikipedia:ja:色空間|RGBA値]]で設定することもできる。
| |
| <syntaxhighlight lang="lua">
| |
| /color COLOR
| |
| /color r g b a
| |
| </syntaxhighlight>
| |
|
| |
|
| === god modeの有効化 ===
| | ; 密度の増加 |
| God modeはプレイヤーキャラクターをなくし、障害物を飛び越えられたりダメージを受けないようにしたりできる。
| | :しばしば、アイテムの間隙に他のアイテムが入れられるほど大きくはないギャップが生じる。しかし、掘削機、インサータ、ベルトのサイドローディングではベルト上のアイテムを一時的に押し込めることで、そうした隙間にもアイテムを無理やり詰め込むことができる。押し込められた隙間は、ベルト前方が再び動き始めたときに通常のサイズまで拡張される。 |
| | ; 速度の増加 |
| | :工場内のベルトがすでに最大の密度だとしても、よりよいベルトにアップグレードして速度を改善できる可能性がある。まず最初にしなければならないのはボトルネックを探すことで、たいていすぐ見つかる。アイテムが高速に(もしくは全く)動かない、もしくは最大密度で停止しているような部分があり、そしてこの「進んでは止まる」状態が突如として解消される箇所もあるだろう。そこがボトルネックだ。大概の場合、こここそがベルト最適化を必要とする場所だ。 |
| | ; ベルトの増加 |
| | :さらなる並列ベルトの追加によってもスループットを向上できる。単純な話、スループットが必要なアイテムを運ぶベルトはたくさん置こう。 |
|
| |
|
| 操作をプレイヤーから切り離す。
| | === ベルト便利ワザ === |
| <syntaxhighlight lang="lua">
| |
| /c game.player.character=nil
| |
| </syntaxhighlight>
| |
|
| |
|
| そうしたら、不要となったプレイヤーにマウスオーバーして破棄する。
| | 敵の襲撃に防御が間に合うためには、高速に移動できることが重要だ。ベルト上を走ると、ベルトの速度に応じて[[player/ja|プレイヤー]]の移動速度が早まったり遅くなったりする。だから、[[defense/ja|防衛拠点]]に向けてベルトを張り巡らせておくと良い。 |
| <syntaxhighlight lang="lua">
| |
| /c game.player.selected.destroy() | |
| </syntaxhighlight>
| |
|
| |
|
| 元に戻すには、プレイヤーキャラクターをスポーンさせる。以下のコマンドでこの世界のスポーン地点に新規プレイヤーを生成し、操作を結びつける。
| | 一方で、プレイヤーのみがベルト上を移動できるわけではない。バイターやスピッターも移動できる。これを悪用して防衛を強化できる。まず、超高速搬送ベルトを壁の前に設置しておくことで、バイターが防壁にたどり着くまでの時間を引き伸ばせる。次に、スピッターを壁の近くに移動できる。こうすれば、より多くのタレットが一度に1体のスピッターを攻撃できる。 |
| <syntaxhighlight lang="lua">
| |
| /c game.player.create_character()
| |
| </syntaxhighlight>
| |
|
| |
|
| == Research ==
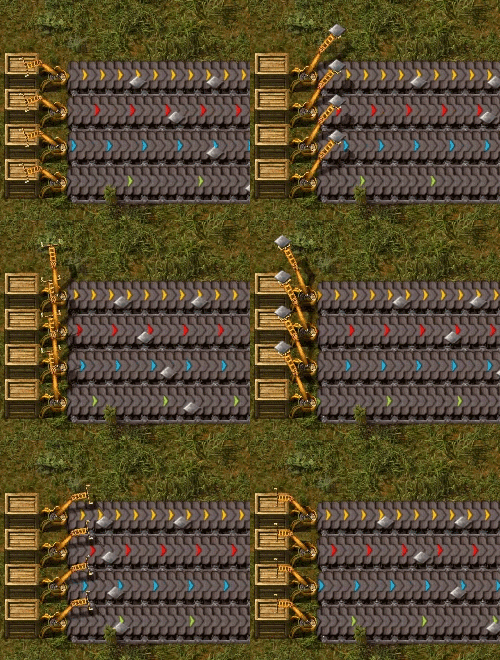
| | ほかの便利な利用法としては、搬送ベルトに[[car/ja|自動車]]を載せることもできる。自動車はインベントリを持ち、[[inserters/ja|インサータ]]で積み込める。つまり、ベルト上を動く箱として利用できる。これにはいくつかのアドバンテージがあり、第一にこの自動車回転寿司のスループットは極めて高い。第二に、インサータスタックサイズボーナスが適用されるので、インサータがより効率的になる。 |
| === Enable faster research ===
| |
| <syntaxhighlight lang="lua">
| |
| /c game.player.force.laboratory_speed_modifier=1 | |
| </syntaxhighlight>
| |
| 1 is normal speed, 2 is double speed 3 is triple etc. I think it goes up to 100.
| |
|
| |
|
| === Researching specific technologies === | | == 分配器(Splitter) == |
| The internal technology names can be found in the infoboxes on their respective pages, click on the little arrow to show them.
| |
| <syntaxhighlight lang="lua">
| |
| /c game.player.force.technologies['electric-energy-distribution-1'].researched=true
| |
| /c game.player.force.technologies['steel-processing'].researched=true
| |
| </syntaxhighlight>
| |
|
| |
|
| === Unresearching specific technologies ===
| | [[Splitters/ja|分配器]]は別の形でアイテムを操作する。分配器は2x1の大きさで、2つまでの入力ベルトからやってきたアイテムを2つまでの出力ベルトに1:1の比で分配する。資源を2本のベルトに分けたり、複数のベルトをバランシングしたりするのに用いられる。 |
| The internal technology names can be found in the infoboxes on their respective pages, click on the little arrow to show them.
| |
| <syntaxhighlight lang="lua">
| |
| /c game.player.force.technologies['electric-energy-distribution-1'].researched=false; game.player.force.set_saved_technology_progress('electric-energy-distribution-1', 0) | |
| /c game.player.force.technologies['steel-processing'].researched=false; game.player.force.set_saved_technology_progress('steel-processing', 0)
| |
| </syntaxhighlight>
| |
|
| |
|
| === Enabling specific recipes === | | === 機構 === |
| The internal recipe/item names can be found in the infoboxes on their respective pages, click on the little arrow to show them.
| |
| <syntaxhighlight lang="lua">
| |
| /c game.player.force.recipes["electric-energy-interface"].enabled=true
| |
| /c game.player.force.recipes["rocket-silo"].enabled=true
| |
| /c game.player.force.recipes.loader.enabled=true
| |
| </syntaxhighlight>
| |
|
| |
|
| Enable all recipes
| | 分配器の挙動は一見単純だ。しかし実のところ、事はそれほど単純でもない。分配器には驚くほど多くの活用法がある。 |
| <syntaxhighlight lang="lua">
| |
| /c for name, recipe in pairs(game.player.force.recipes) do recipe.enabled = true end
| |
| </syntaxhighlight>
| |
|
| |
|
| === Finish research immediately ===
| | * 分配器は入出力ベルトを2つずつ持つ。1本のベルトからアイテムを受け取った場合、2本の出力に均等に分配する。 |
| <syntaxhighlight lang="lua">
| | * もし片方の出力が完全に詰まっていて、均等に分配できない場合、すべての入力を空いている方の出力ベルトに流す。 |
| /c for name,technology in pairs(game.player.force.technologies) do technology.researched=technology.enabled end
| | * 分配器は、2本の入力に対し1本の出力しか持たないこともできる。 |
| </syntaxhighlight>
| | * 分配器はアイテムのレーンを保存する。右レーンのアイテムを左レーンに移動することはなく、逆もまた然り。 |
| | * 分配器は片方の入出力を優先できる。分配器をクリックしてGUIを開くことで、優先度を設定できる。 |
| | * 分配器の出力ベルト1本を1種類のアイテムにフィルタリングできる。そのアイテムのみがその出力に流れ、それ以外はもう片方に流れるようになる。フィルタが設定されていると、その側の出力ベルトが優先される。 |
|
| |
|
| == Command Line Parameters ==
| | ベルトを結合/分割するには、分配器が入力ベルトと同じ速さでなければならず、さもなくば分配器がボトルネックと化す。 |
| '''As of Game Version 0.15.13'''
| |
|
| |
|
| Command line parameters can be used to set settings in the command line before the game launches, this is useful mainly for advanced users or server hosts.
| | ==== 優先度 ==== |
| | 分配器の入力側も出力側も、左右どちらかを優先できる。 |
|
| |
|
| General options:
| | 入力優先度が設定された分配器は、その側の入力を先に利用しようとし、優先入力ベルトが空いているときのみもう片方を利用する。 |
| -h [ --help ] display help
| |
| --version show version information
| |
| -v [ --verbose ] enable verbose logging
| |
| -c [ --config ] PATH config file to use
| |
| --no-log-rotation don't rotate log file
| |
| --mod-directory PATH Mod directory to use
| |
| --check-unused-prototype-data Print a warning for all prototype values that were not accessed
| |
|
| |
|
| Running options:
| | 同様に、出力優先度が設定された分配器もすべての入力をその側に流そうとし、優先出力ベルトが詰まっているときのみもう片方に出力する。 |
| -s [ --map2scenario ] arg map to scenario conversion
| |
| -m [ --scenario2map ] arg scenario to map conversion
| |
| --apply-update arg immediately apply update package
| |
| --create FILE create a new map
| |
| --map-gen-settings FILE Map generation settings for use with --create. See data/map-gen-settings.example.json
| |
| --map-settings FILE Map settings for use with --create. See data/base/prototypes/map-settings.lua
| |
| --preset arg Name of the map generation preset to be used.
| |
| --generate-map-preview FILE Generate preview images of the map
| |
| --map-preview-size SCALE (=1,024) Size (in pixels) of map preview
| |
| --map-preview-scale SCALE (=1) Scale (meters per pixel) of map preview
| |
| --map-preview-offset X,Y (=0,0) Offset of the center of the map, in meters
| |
| --start-server FILE start a multiplayer server
| |
| --start-server-load-scenario FILE start a multiplayer server and load the specified scenario
| |
| --start-server-load-latest start a multiplayer server and load the latest available save
| |
| --until-tick TICK run a save until given map tick
| |
| --mp-connect ADDRESS start factorio and connect to address
| |
| --load-game FILE start Factorio and load a game in singleplayer
| |
| --benchmark FILE load save and run benchmark
| |
| --benchmark-ticks N (=1,000) number of ticks for benchmarking. Default is 1000
| |
| --force-opengl use OpenGL for rendering
| |
| --force-d3d use Direct3D for rendering
| |
| --fullscreen BOOL start game in windowed mode (saved to configuration)
| |
| --max-texture-size N maximal size of texture that the game can use (saved to configuration). Should be power of two greater than 2048
| |
| --graphics-quality arg accepted values: normal, low, very-low
| |
| --video-memory-usage arg accepted values: all, high, medium, low
| |
| --gfx-safe-mode resets some graphics settings to values that should work on most configurations
| |
| --shader arg enable/disable shader postprocessing (saved to configuration)
| |
| --disable-audio Disable audio. Mainly for faster startup during development.
| |
|
| |
|
| Server options:
| | ==== フィルタ ==== |
| --port N network port to use
| | 分配器のフィルタスロットに特定のアイテムが設定されている場合、出力優先度のスライダーはフィルタ用になる。設定された種別のアイテムはすべてその出力に流され、他のアイテムは全てもう一方に流される。入力優先度はフィルタと独立して設定できる。 |
| --bind ADDRESS[:PORT] IP address (and optionally port) to bind to
| |
| --rcon-port N Port to use for RCON
| |
| --rcon-password PASSWORD Password for RCON
| |
| --server-settings FILE Path to file with server settings. See data/server-settings.example.json
| |
| --server-whitelist FILE Path to file with server whitelist.
| |
| --server-banlist FILE Path to file with server banlist.
| |
| --console-log FILE Path to file where a copy of the server's log will be stored
| |
| --server-id FILE Path where server ID will be stored or read from
| |
|
| |
|
| === Multiplayer === | | === バランシング === |
|
| |
|
| --start-server SAVE
| | {{Main|Balancer mechanics/ja|l1=バランシング機構}} |
|
| |
|
| Will start a Headless (Dedicated) server, with no GUI.
| | 分配器は、複数本のベルトや複数個のベルトレーンを均等に分配するためにも利用できる。 |
|
| |
|
| --mp-connect ADDRESS
| | === ベルトレーン操作 === |
| ADDRESS is the IP:port of the remote host. Port is optional.
| | <gallery mode="slideshow"> |
| Examples:
| | File:Swap_belt_lanes.png|レーンごとに異なるアイテムが載ったベルトのレーンを入れ替えている。 |
| | File:Splitter_seperate_belt_lanes.png|異なるアイテムが載ったレーンを分割する。 |
| | </gallery> |
|
| |
|
| ./factorio --mp-connect 192.168.1.101
| | == 地下搬送ベルト(Underground belt) == |
| ./factorio --mp-connect 192.168.1.101:2345
| |
|
| |
|
| As above, port can be specified by placing the port number after a colon in the address.
| | Underground belts can be used to cross different flows of items without interfering. They move items like a [[Transport belts/ja|通常のベルト]]. |
|
| |
|
| --map2scenario SAVE
| | * Underground belts can cross any number of entities and all types of ground, like water and grass. (as long as the input and output endpoints are on land) |
| Converts a save game to a User Scenario, allows saved game state to be loaded into map editor.
| | * Underground belts can cross other underground entities (any number of underground belts or underground pipes). They won't be mixed. |
| Assuming that save game name is "foo.zip", executing './factorio --map2scenario s1' will result in Factorio loading, opening the save file, and saving the scenario into the scenario folder.
| | * For the connection only the endpoints (entry-side and exit-side) are relevant. |
| | * The maximum distance underground is 8 [[tile/ja|tile]]s with [[express underground belt/ja|超高速地下搬送ベルト]]s. |
| | * An underground belt pair of that bridges a gap of 4 tiles stores up to 44 items. An express underground belt pair at max length stores up to 72 items. |
| | * The half of the underground belt tile with a belt can accept input from the side. The other half (with a tunnel entrance) blocks incoming items. |
|
| |
|
| == Modding tools == | | === ベルトレーン分岐 === |
| A list of the internal names of most things in the vanilla game can also be found on [[data.raw]].
| | <gallery mode="slideshow"> |
| === Write all researched technologies to file ===
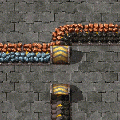
| | File:Block belt lane.png|This is built by placing one underground belt and then using R to reverse its direction. This converts the underground belt entrance to an exit (and vice versa). |
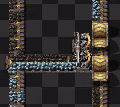
| <syntaxhighlight lang="lua"> | | File:Transport belts unmerge.gif|This can also be used to split the lanes of a belt onto seperate belts instead of using a splitter filter. |
| /c local list = {}
| |
| for _, tech in pairs(game.player.force.technologies) do
| |
| if tech.researched then
| |
| list[#list+1] = tech.name
| |
| end
| |
| end
| |
| game.write_file("techs.lua", serpent.block(list) .. "\n", true)
| |
| </syntaxhighlight>
| |
|
| |
|
| === Write all enabled recipes to file ===
| | </gallery> |
| <syntaxhighlight lang="lua"> | |
| /c local list = {} | |
| for _, recipe in pairs(game.player.force.recipes) do
| |
| if recipe.enabled then
| |
| list[#list+1] = recipe.name
| |
| end
| |
| end
| |
| game.write_file("recipes.lua", serpent.block(list) .. "\n", true)
| |
| </syntaxhighlight>
| |
|
| |
|
| == See also == | | == 関連項目 == |
| | * [[Splitters/ja|分配器]] |
| | * [[Transport belts/ja|搬送ベルト]] |
| | * [[Underground belts/ja|地下搬送ベルト]] |
|
| |
|
| * http://lua-api.factorio.com/latest/ - Factorio API reference for latest version
| | <nowiki>{{C|Belt transport system}}</nowiki> |
