Railway: Difference between revisions
(Cleaned up grammar and needless phrases.) |
(Cleaned up grammar and phrasing, added example of tracks being too close together, added rail safety section to replace Railway/Do not cross the tracks) |
||
| Line 5: | Line 5: | ||
<i>For the research see [[Railway (research)]]</i> | <i>For the research see [[Railway (research)]]</i> | ||
The Railway is one of the main transport methods in Factorio. Although the installation of such | The Railway is one of the main transport methods in Factorio. Although the installation of such a network can be complicated, and requires a large amount of resource and space, it is faster and more efficient than [[Belt transport system|belts]] and [[Logistic network|robot logistics]], especially over large distances. | ||
Railway construction, however, is not understood in an instant. It takes some time to learn the basics, such as automating transportation. Learning how to manage and upkeep a larger train network takes time and experience. | Railway construction, however, is not understood in an instant. It takes some time to learn the basics, such as automating transportation. Learning how to manage and upkeep a larger train network takes time and experience. | ||
; [[Railway/Tutorials]] | ; [[Railway/Tutorials]] | ||
: Sometimes a picture/video says more than a thousand words. | : Sometimes a picture/video says more than a thousand words. | ||
== Tracks == | |||
[[File:rail_planner_starter.jpg|thumb|right|200px|The small green arrow used to start the planner.]] | |||
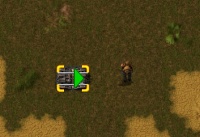
Rails are placed using the rail planner. Place a single rail, then mouse over the rail while still holding rails in hand. A green arrow will appear on the rail indicating the direction the new rail will be placed. Click or shift-click on the triangle to start the manual or ghost planner. | |||
Bear in mind that rails can rails are placed on a two-tile grid, so you cannot move a rail by only one tile. | |||
[[File:Manual_rail_planner.jpg|thumb|left|200px|The rail planner operating in manual mode.]] | |||
[[File:Ghost_rail_planner.jpg|thumb|200px|right|The rail planner operating in ghost mode.]] | |||
===Manual Planner=== | |||
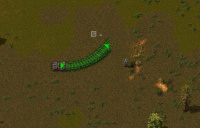
The manual planner can be used to place rails at close range, around 10 rails at a time. The rails will path towards the cursor. Move the cursor until you get the desired path, then left-click to place the rails. This process will repeat until you press <code>Esc</code> to release the planner. | |||
===Ghost Planner=== | |||
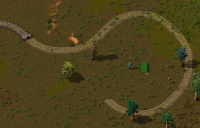
The ghost planner can be used to place long stretches of rail at once, by creating ghosts of rails that can be placed by [[construction robots]], either from [[roboport]]s or a [[personal roboport]]. Move the cursor to the position you want the rail to terminate, press <code>R</code> to rotate the last rail to the desired orientation, then left-click to place the ghost rails. The rails will be placed using the shortest route from the origin to the destination avoiding obstacles. You can shift-click to use the shortest route; trees and stone rocks in the way will be marked for destruction. Use <code>Esc</code> or <code>Q</code> to release the planner. | |||
[[File:rail-switch-example-1.png|thumb|left|256px|Composition of rails to form switches, straight and diagonal.]] | |||
[[File:Railway-parallel-example.png|thumb|right|256px|Switching between rails with and without adequate spacing.]] | |||
=== Switches === | === Switches === | ||
* There is no visual representation of a working switch. Using the rail planner, the player must place a [[straight rail|rail]] overlapping an existing rail to form a switch. | |||
* There is no visual representation of a working switch. Using the | |||
* The crossing of two straight tracks is not usable as switch, as trains have a limited turning radius. They do, however, connect [[Railway/Signal/Block signal| signal blocks]] which helps prevent collisions. | * The crossing of two straight tracks is not usable as switch, as trains have a limited turning radius. They do, however, connect [[Railway/Signal/Block signal| signal blocks]] which helps prevent collisions. | ||
* Parallel tracks do not interact with each other and generally have no problems. However, switching from one track to the other can require extra resources if | * Parallel tracks do not interact with each other and generally have no problems. However, switching from one track to the other can require extra resources if they are too close together; the track must turn away from the other parallel track and then turn back to it. This can create complicated networks of signals and, as such, one should generally not build parallel tracks unless they are spaced adequately. | ||
<br style="clear:both" /> | |||
== Trains == | == Trains == | ||
{| class="wikitable" | {| class="wikitable" | ||
|{{imagelink|diesel-locomotive|Diesel locomotive}} || {{imagelink|cargo-wagon|Cargo wagon}} |- | |{{imagelink|diesel-locomotive|Diesel locomotive}} || {{imagelink|cargo-wagon|Cargo wagon}} |- | ||
|} | |} | ||
[[File:Railway-locomotive-gui.png|thumb|left|256px|Locomotive screen: 1: switch to schedule screen; 2: [[Fuel]] inventory;]] | |||
[[File:Railway-assemble-train.png|thumb|right|256px|Placing a [[Cargo wagon]] so it is attached to the train.]] | |||
[[File:station-example-1.png|thumb|left|256px|A very minimal station.]] | |||
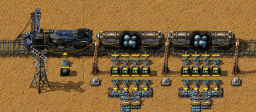
* A train consists of at least one locomotive, but the player may add additional locomotives to keep the train moving at maximum speed, allow it to move in both directions automatically, or they may add [[Cargo wagon]]s to transport resources with the train. | * A train consists of at least one locomotive, but the player may add additional locomotives to keep the train moving at maximum speed, allow it to move in both directions automatically, or they may add [[Cargo wagon]]s to transport resources with the train. | ||
* Locomotives may be '''manually''' driven forwards or backwards, however, locomotives are generally slower going backwards. The left and right movement keys are used to change direction at switches. | * Locomotives may be '''manually''' driven forwards or backwards, however, locomotives are generally slower going backwards. The left and right movement keys are used to change direction at switches. | ||
* | * Trains can only drive forwards automatically; there must be a forward path from to the destination station. This can be solved by placing a locomotive at either end of a train (facing opposite directions), or adding a loop in the rail. Note that signals in a loop can misbehave due to detecting trains before they arrive. | ||
* A train needs [[fuel]] to drive. Fuel can be added by inserters. | * A train needs [[fuel]] to drive. Fuel can be added by inserters. | ||
The locomotives' inventory is only used for [[Fuel]]. To transport items [[Cargo wagon]]s have to be attached to the train. To attach a Cargo wagon, the player may either prepare to place one near an existing train, where a green graphic will show the player that the cargo wagon will be attached, showing a connection between the train and the new wagon. Alternatively, the player may manually connect cargo wagons to trains with the stock connect key, if the cargo wagon was placed far away from a train. The cargo wagons can be filled manually or by adjacent [[Inserters]]. | The locomotives' inventory is only used for [[Fuel]]. To transport items [[Cargo wagon]]s have to be attached to the train. To attach a Cargo wagon, the player may either prepare to place one near an existing train, where a green graphic will show the player that the cargo wagon will be attached, showing a connection between the train and the new wagon. Alternatively, the player may manually connect cargo wagons to trains with the stock connect key, if the cargo wagon was placed far away from a train. The cargo wagons can be filled manually or by adjacent [[Inserters]]. | ||
= | <br style="clear:both" /> | ||
== Signals == | |||
== | |||
{| class="wikitable" | {| class="wikitable" | ||
| {{imagelink|rail-signal|Rail signal}} || {{imagelink|rail-chain-signal|Rail chain signal}} |- | | {{imagelink|rail-signal|Rail signal}} || {{imagelink|rail-chain-signal|Rail chain signal}} |- | ||
|} | |} | ||
[[File:Railway-signals-1.png|thumb|left|256px|Block #1 is occupied, signal into that Block is red. Block #2 is approached, thus showing yellow, other blocks are free, signals showing green.]] | |||
[[File:station-example-3.png|thumb|right|256px|Train Station with multiple [[Train stop]]s and [[Rail signal]]s to allow operation of multiple trains on single track.]] | |||
[[File:Railway-signals-2.png|thumb|left|256px|Block #1 occupied, signal red. Block #2 approaching, showing yellow. Chain signal #3 is reflecting block signal #2. The chain signal #4 is showing red, because the block is to be approached from another direction, thus the block is considered occupied.]] | |||
[[File:Railway-test-setup.png|thumb|right|256px|A simple test setup to start with. Containing [[Train stop]]s for schedules, and [[Rail signal]]s to watch their behaviour.]] | |||
Understanding rail signals can be difficult. Several terms critical to understanding them are below: | Understanding rail signals can be difficult. Several terms critical to understanding them are below: | ||
| Line 57: | Line 66: | ||
: A piece of track (one item). | : A piece of track (one item). | ||
*Segment | *Segment | ||
: A single path of continuous | : A single path of continuous track without intersections or switches. This becomes important when signals are employed. The player may mouse over a segment to see its number. | ||
*Block | *Block | ||
: A set of segments defined by rail signals. By default every connected segment belongs to one block, no matter whether a train can drive on it or not, and even if it can be driven only in one direction (e.g. at a switch, both segments of the switch belong to the same block). The player can see the current block numbers of a rail piece in the info section on mouseover. '''See also [https://forums.factorio.com/viewtopic.php?f=18&t=3811#p28310 this forum post]''' for a good explanation about blocks. | |||
: A set of segments defined by rail signals. By default every connected segment belongs to one block, no matter whether a train can drive on it or not, and even if it can be driven only in one direction ( | |||
Rail signals are used to employ multiple trains automatically. Note that driving a train manually ignores most of the rules described here; other automatic trains will follow signaling indicted by the player's movement dynamically, however it will sometimes be not possible to avoid a collision for automatic trains if the player ignores red/yellow signals. Always beware automatic trains and give them the right of way. | |||
=== Basic Signalling Rules === | |||
*There is at most one Train in a block at any time. A train spanning multiple blocks occupies them all. | |||
*A red signal means that the following block is occupied by a train. | |||
*A yellow signal means that a train is approaching and already has the approval to enter the following block. | |||
*[[Rail signal]]s separate a new block and reflect its state: green - free, yellow - reserved, red - occupied | |||
*[[Rail chain signal]]s separate a new block and reflect the state of the next [[Rail signal]] | |||
*A train can only pass a signal on the right of the track, or if there is a signal on both sides on the same rail segment. | |||
<br style="clear:both" /> | |||
== Railway Safety == | |||
[[File:fff-140-controlled-gates.gif|thumb|An example of a safe railway crossing.]] | |||
Trains travel very quickly and deal great damage upon impact. Without proper railway safety, crossing an active track can result in a swift death. | |||
Some tips for avoiding unwanted contact with trains: | |||
*Zoom out before crossing so you can see trains coming. | |||
*Check for nearby signals; if a signal changes from green to yellow or red, this means a train is approaching. | |||
*Avoid walking near tracks; you can be hit even if you are not fully on the track. | |||
*Do not try to enter/exit a train while it is moving. | |||
=== Crossing Safely === | |||
A safe railway crossing can be created by never allowing a train and the player on the track at the same time. When a train has the segment reserved, the gates close to the player, restricting access to tracks. When the player is on the tracks, the signals are reserved by the [[circuit network]], and trains must wait for the player to clear the tracks before continuing. The gates onto the rest of the track also close, preventing the player from getting to the tracks outside the crossing. | |||
== Defence of rail systems == | == Defence of rail systems == | ||
As trains are a priority target of [[Enemies]], any place where trains can stop should be (more or less) [[Defense|defended]]. This is of course more important at train stops/stations. When a train moves it is more or less invincible and destroys nearly everything in the way, especially Enemies and players. | As trains are a priority target of [[Enemies]], any place where trains can stop should be (more or less) [[Defense|defended]]. This is of course more important at train stops/stations. When a train moves it is more or less invincible and destroys nearly everything in the way, especially Enemies and players. | ||
| Line 84: | Line 104: | ||
=== About Trains === | === About Trains === | ||
* [[Vehicle/Train]] - the handling of loco and wagon | * [[Vehicle/Train]] - the handling of loco and wagon | ||
* [[Railway/Train path finding]] - how the trains find their path. | * [[Railway/Train path finding]] - how the trains find their path. | ||
=== About train stations and stops === | === About train stations and stops === | ||
* [[Railway/Train station]]s - about the loading/unloading of trains | * [[Railway/Train station]]s - about the loading/unloading of trains | ||
* [[Railway/Automated transport]] - all about automated transport. | * [[Railway/Automated transport]] - all about automated transport. | ||
=== About Signalling === | === About Signalling === | ||
* [[Railway/Signal/Tutorial]] | |||
* [[Railway/Deadlocks]] | * [[Railway/Deadlocks]] | ||
* [http://www.factorioforums.com/forum/viewtopic.php?f=30&t=6936&p=54469#p54469 train signal behavior] | * [http://www.factorioforums.com/forum/viewtopic.php?f=30&t=6936&p=54469#p54469 train signal behavior] | ||
Revision as of 17:32, 25 September 2016
| Page "Railway" has been recommended for clean-up. Reason: Lots of outdated info, should be updated to completely reflect V0.13. The large amount of links at the bottom should also be dealt with. |
|---|
| This may mean fixing grammar or broken links, providing better explanations, or removing incorrect/outdated info. |
| Further recommendations for this page's clean-up can be made at Talk:Railway. |
For the research see Railway (research)
The Railway is one of the main transport methods in Factorio. Although the installation of such a network can be complicated, and requires a large amount of resource and space, it is faster and more efficient than belts and robot logistics, especially over large distances.
Railway construction, however, is not understood in an instant. It takes some time to learn the basics, such as automating transportation. Learning how to manage and upkeep a larger train network takes time and experience.
- Railway/Tutorials
- Sometimes a picture/video says more than a thousand words.
Tracks
Rails are placed using the rail planner. Place a single rail, then mouse over the rail while still holding rails in hand. A green arrow will appear on the rail indicating the direction the new rail will be placed. Click or shift-click on the triangle to start the manual or ghost planner.
Bear in mind that rails can rails are placed on a two-tile grid, so you cannot move a rail by only one tile.
Manual Planner
The manual planner can be used to place rails at close range, around 10 rails at a time. The rails will path towards the cursor. Move the cursor until you get the desired path, then left-click to place the rails. This process will repeat until you press Esc to release the planner.
Ghost Planner
The ghost planner can be used to place long stretches of rail at once, by creating ghosts of rails that can be placed by construction robots, either from roboports or a personal roboport. Move the cursor to the position you want the rail to terminate, press R to rotate the last rail to the desired orientation, then left-click to place the ghost rails. The rails will be placed using the shortest route from the origin to the destination avoiding obstacles. You can shift-click to use the shortest route; trees and stone rocks in the way will be marked for destruction. Use Esc or Q to release the planner.
Switches
- There is no visual representation of a working switch. Using the rail planner, the player must place a rail overlapping an existing rail to form a switch.
- The crossing of two straight tracks is not usable as switch, as trains have a limited turning radius. They do, however, connect signal blocks which helps prevent collisions.
- Parallel tracks do not interact with each other and generally have no problems. However, switching from one track to the other can require extra resources if they are too close together; the track must turn away from the other parallel track and then turn back to it. This can create complicated networks of signals and, as such, one should generally not build parallel tracks unless they are spaced adequately.
Trains
| Diesel locomotive | Cargo wagon |- |

- A train consists of at least one locomotive, but the player may add additional locomotives to keep the train moving at maximum speed, allow it to move in both directions automatically, or they may add Cargo wagons to transport resources with the train.
- Locomotives may be manually driven forwards or backwards, however, locomotives are generally slower going backwards. The left and right movement keys are used to change direction at switches.
- Trains can only drive forwards automatically; there must be a forward path from to the destination station. This can be solved by placing a locomotive at either end of a train (facing opposite directions), or adding a loop in the rail. Note that signals in a loop can misbehave due to detecting trains before they arrive.
- A train needs fuel to drive. Fuel can be added by inserters.
The locomotives' inventory is only used for Fuel. To transport items Cargo wagons have to be attached to the train. To attach a Cargo wagon, the player may either prepare to place one near an existing train, where a green graphic will show the player that the cargo wagon will be attached, showing a connection between the train and the new wagon. Alternatively, the player may manually connect cargo wagons to trains with the stock connect key, if the cargo wagon was placed far away from a train. The cargo wagons can be filled manually or by adjacent Inserters.
Signals
| Rail signal | Rail chain signal |- |
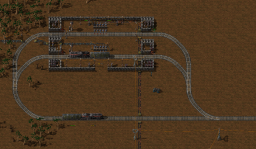
Understanding rail signals can be difficult. Several terms critical to understanding them are below:
- Rail segment
- A piece of track (one item).
- Segment
- A single path of continuous track without intersections or switches. This becomes important when signals are employed. The player may mouse over a segment to see its number.
- Block
- A set of segments defined by rail signals. By default every connected segment belongs to one block, no matter whether a train can drive on it or not, and even if it can be driven only in one direction (e.g. at a switch, both segments of the switch belong to the same block). The player can see the current block numbers of a rail piece in the info section on mouseover. See also this forum post for a good explanation about blocks.
Rail signals are used to employ multiple trains automatically. Note that driving a train manually ignores most of the rules described here; other automatic trains will follow signaling indicted by the player's movement dynamically, however it will sometimes be not possible to avoid a collision for automatic trains if the player ignores red/yellow signals. Always beware automatic trains and give them the right of way.
Basic Signalling Rules
- There is at most one Train in a block at any time. A train spanning multiple blocks occupies them all.
- A red signal means that the following block is occupied by a train.
- A yellow signal means that a train is approaching and already has the approval to enter the following block.
- Rail signals separate a new block and reflect its state: green - free, yellow - reserved, red - occupied
- Rail chain signals separate a new block and reflect the state of the next Rail signal
- A train can only pass a signal on the right of the track, or if there is a signal on both sides on the same rail segment.
Railway Safety
Trains travel very quickly and deal great damage upon impact. Without proper railway safety, crossing an active track can result in a swift death.
Some tips for avoiding unwanted contact with trains:
- Zoom out before crossing so you can see trains coming.
- Check for nearby signals; if a signal changes from green to yellow or red, this means a train is approaching.
- Avoid walking near tracks; you can be hit even if you are not fully on the track.
- Do not try to enter/exit a train while it is moving.
Crossing Safely
A safe railway crossing can be created by never allowing a train and the player on the track at the same time. When a train has the segment reserved, the gates close to the player, restricting access to tracks. When the player is on the tracks, the signals are reserved by the circuit network, and trains must wait for the player to clear the tracks before continuing. The gates onto the rest of the track also close, preventing the player from getting to the tracks outside the crossing.
Defence of rail systems
As trains are a priority target of Enemies, any place where trains can stop should be (more or less) defended. This is of course more important at train stops/stations. When a train moves it is more or less invincible and destroys nearly everything in the way, especially Enemies and players.
Relationship to OpenTTD
Factorio's railway system works basically exactly like the block signals in Open Traffic Tycoon Deluxe. Players who have ever played that game will find some elements of it in Factorio. If not, they can learn from the OpenTTD documentation.
User tips and tricks
This section contains further links to in-depth knowledge. As a general advisory, tips given in this section detail the more intricate mechanics in the game and can be dangerous to the experience of players who wish to discover better methods on their own. Be warned that much of the info below could be outdated/incorrect.
About Trains
- Vehicle/Train - the handling of loco and wagon
- Railway/Train path finding - how the trains find their path.
About train stations and stops
- Railway/Train stations - about the loading/unloading of trains
- Railway/Automated transport - all about automated transport.
About Signalling
Misc tips
- When supply trains follow the player: http://www.factorioforums.com/forum/viewtopic.php?f=5&t=6203
- The player may lay rails by sitting inside of the train.
