User:Zarath8128: Difference between revisions
Zarath8128 (talk | contribs) (Created page with "翻訳途中のページ Taranlating page {{Languages}} {{:Infobox:Construction robot}} '''建設ロボット(Construction robots)'''は自動化された浮遊するロボ...") |
Zarath8128 (talk | contribs) No edit summary |
||
| (2 intermediate revisions by the same user not shown) | |||
| Line 1: | Line 1: | ||
翻訳途中のページ | 翻訳途中のページ | ||
Taranlating page | Taranlating page | ||
--- | |||
{{Languages}} | {{Languages}} | ||
''' | <!-- Fried biter 氏による翻訳を参考に --> | ||
'''ベルト輸送システム(Belt transport system)'''は、アイテムを異なる場所の間で輸送するために[[player/ja|プレイヤー]]が最初に触れることとなるシステムです。 | |||
ベルト輸送システムは[[Railway/ja|列車]]、[[Logistic network/ja|物流ロボット]]と並んで、Factorioにおけるアイテム輸送システムを構成しています。 | |||
<!-- (訳注:0.16現在、"transport"は搬送ベルトについてのみ「搬送」と訳され、それ以外に於いては「輸送」と訳されている。以下では固有名詞以外は「輸送」に統一する) by Fried biter --> | |||
<!-- 以降の翻訳は Fried biter 氏の方針に従うことにする by Zarath8128--> | |||
搬送ベルトは特にアイテムの輸送に用いられ、エネルギーを使わずに稼働します。ベルトは他の動くエンティティ、例えば[[player/ja|プレイヤー]]、[[vehicle/ja|乗り物]]や[[enemies/ja|バイター]]とも干渉することが可能で、その動きを速めたり遅めたりすることができます。 | |||
== 概要 == | |||
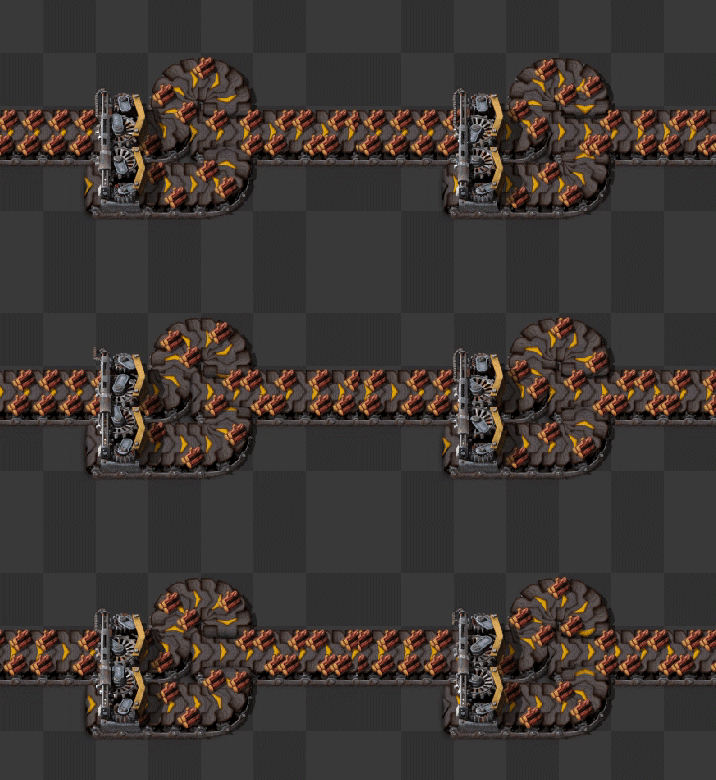
[[File:Transport_belts_speed.gif|300px|thumb|top|3種類のベルトとその速さを表すアニメーション。上から順に、通常ベルト、高速ベルト、超高速ベルト。]] | |||
ベルトには3つのティアが存在します。最初のティアの属するには[[transport belt/ja|搬送ベルト]]です。搬送ベルトは黄色いベルトで、最も遅いベルトですが、最も製造コストが安いベルトでもあります。次のティアに属するのは | |||
[[fast transport belt/ja|高速搬送ベルト]]です。赤いベルトで、通常の搬送ベルトよりも2倍高速です。最後のティアに属するのは[[express transport belt/ja|超高速搬送ベルト]]です。これは青いベルトで、搬送ベルトの3倍、ないし高速搬送ベルトの1.5倍高速です。<br> | |||
{| class="wikitable" | |||
! [[Transport belts/ja|搬送ベルト]] !! [[Underground belts/ja|地下搬送ベルト]] !! [[Splitters/ja|分配機]] !! 最大スループット <br>(個/[[Time#Seconds/ja|秒]]) !! 必要研究 | |||
|- | |||
| {{Imagelink|Transport belt|Transport belt/ja|搬送ベルト}} | |||
| {{Imagelink|Underground belt|Underground belt/ja|地下搬送ベルト}} | |||
| {{Imagelink|Splitter|Splitter/ja|分配器}} | |||
| 15 | |||
| [[Logistics (research)/ja|物流学1]]<sup>1</sup> | |||
|- | |||
| {{Imagelink|Fast transport belt|Fast transport belt/ja|高速搬送ベルト}} | |||
| {{Imagelink|Fast underground belt|Fast underground belt/ja|高速地下搬送ベルト}} | |||
| {{Imagelink|Fast splitter|Fast splitter/ja|高速分配器}} | |||
| 30 | |||
| [[Logistics 2 (research)/ja|物流学2]] | |||
|- | |||
| {{Imagelink|Express transport belt|Express transport belt/ja|超高速搬送ベルト}} | |||
| {{Imagelink|Express underground belt|Express underground belt/ja|超高速地下搬送ベルト}} | |||
| {{Imagelink|Express splitter|Express splitter/ja|超高速分配器}} | |||
| 45 | |||
| [[Logistics 3 (research)/ja|物流学3]] | |||
|- | |||
|} | |||
<sup>(1)</sup> 地下搬送ベルトと分配器のみ。搬送ベルトはゲーム開始時から利用可能。 | |||
ティアに関係なく、アイテムで一杯になったベルトは8つのアイテムを保持できます。詳細は[https://factorio.com/blog/post/fff-276 Friday Facts #276 - Belt item spacing]参照。 | |||
{{clear}} | |||
== Belt mechanics == | |||
=== Merging and un-merging belts === | |||
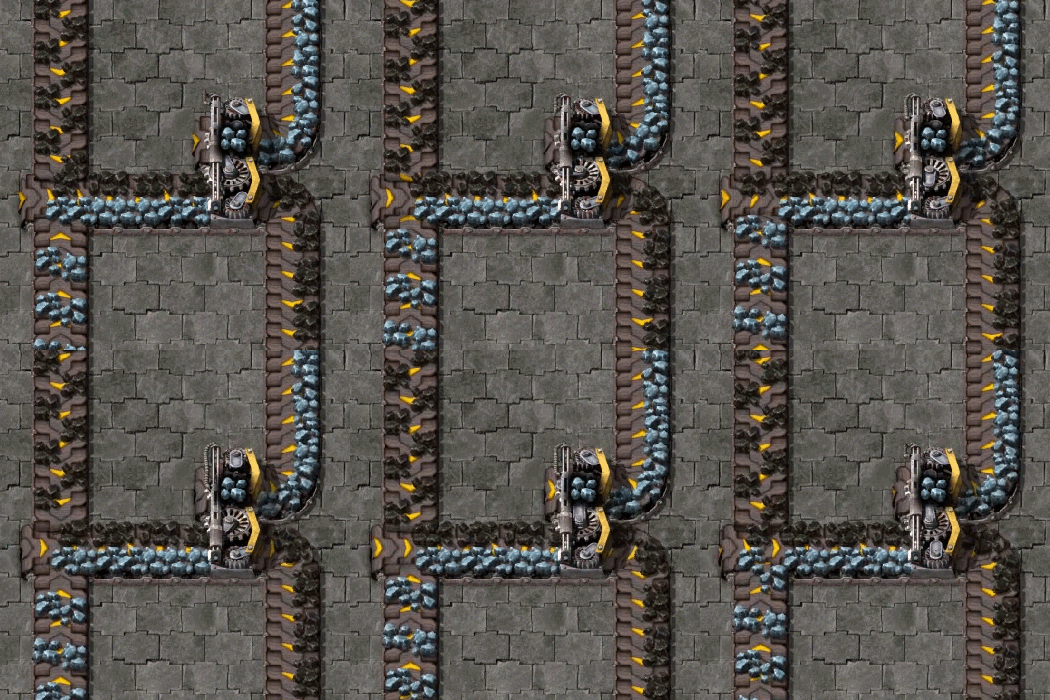
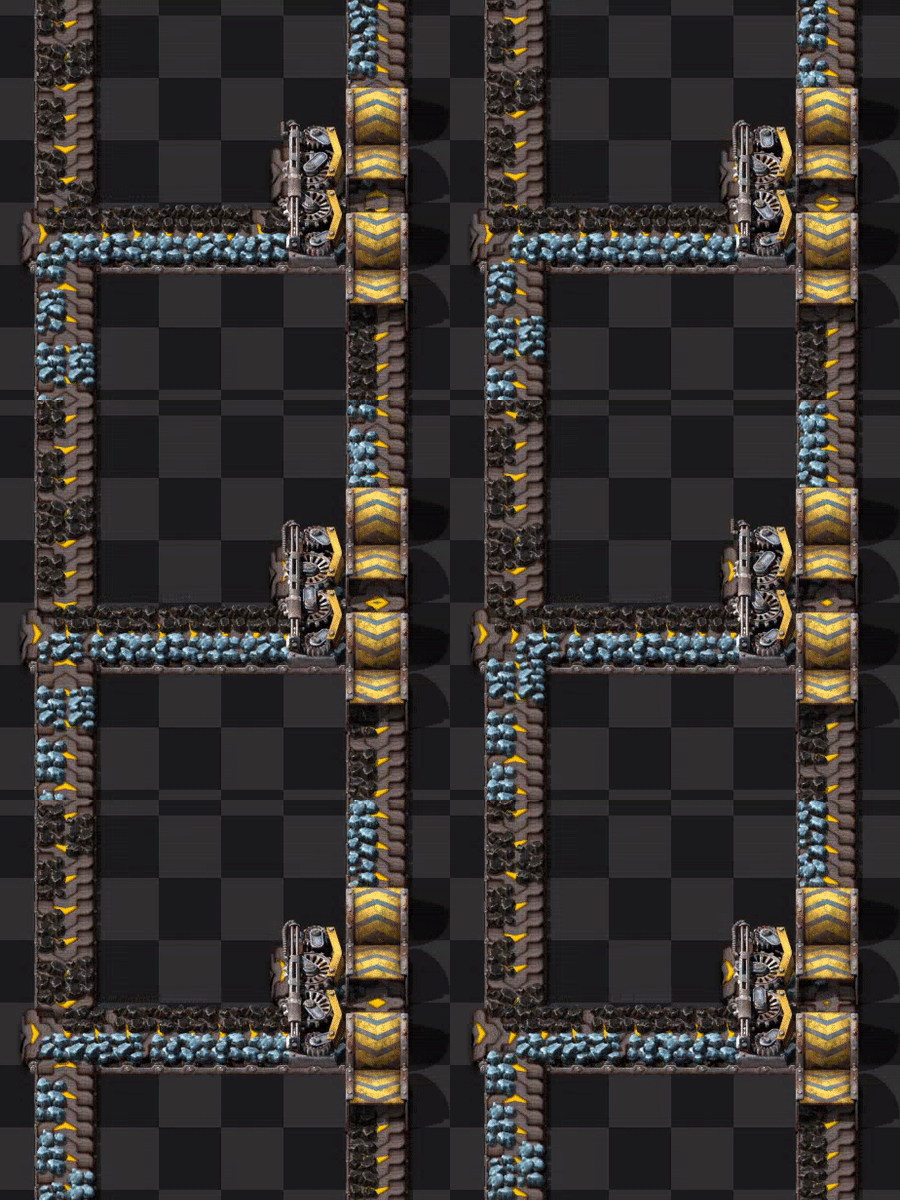
Belts of all tiers have 2 lanes for items to ride on. This allows for either a double flow of one material, or to transport two different materials on the same belt. Mixed belts can be beneficial for | |||
smelting ore, or producing items with many different ingredients such as [[Utility science pack]]. The belt can be unmerged using a splitter filter. It is also possible to unmerge a mixed belt by using underground belts since an underground belt will block half of the belt. | |||
[[File:Transport_belts_2_lanes.gif|top]] [[File:Transport_belts_unmerge.gif|top]] | |||
Commonly, merging and un-merging is done by using a [[splitter]]. The trick in the second gif is better described in the '''[[Belt_transport_system#Separating_belt_lanes|Underground Belt]]''' section. | |||
=== Lane balance === | |||
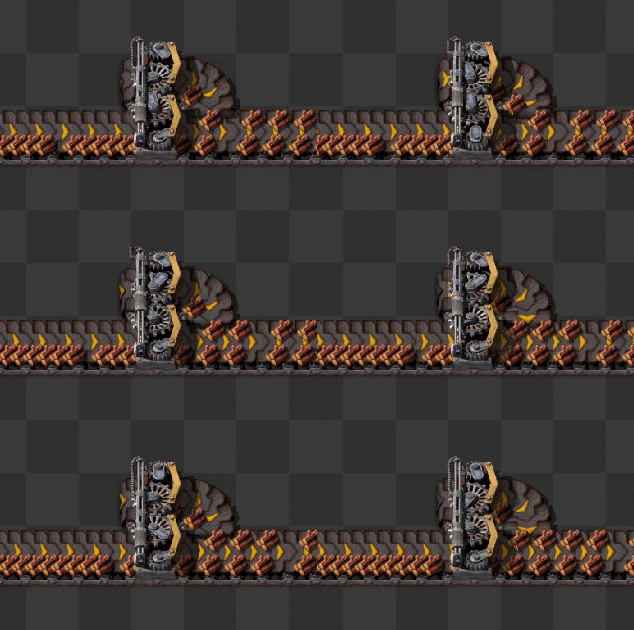
Due to how items are placed onto belts by [[inserters]], their lanes can sometimes become unbalanced. In order to | |||
maintain throughput, balancing the lanes may be necessary. The gifs below show two ways how to do this. The former only works if only one lane is in use initially. For further explanation of the mechanics, see [[Balancer mechanics#Lane_balancers|lane balancers]]. | |||
[[File:Transport_belts_balance1.gif|top]] [[File:Transport_belts_balance2.gif|top]] | |||
=== Belt throughput === | |||
[[File:Stack inserters fill express belt.gif|frame|230px|right|4 [[stack inserter]]s can compress an express belt at stack size 12 for the left inserters and stack size 8 for the right inserters.]] | |||
Maximizing the throughput means ensuring that as many items as possible are transported. Therefore some definitions need to | |||
be introduced: | |||
; Speed | |||
: How fast a belt moves in tiles per second. This is 1.875, 3.75 and 5.625 for basic, fast and express belts. | |||
; Density | |||
: How tight are the items put onto the belts; each straight belt piece can hold exactly 8 items. | |||
; Throughput | |||
: This is speed × density. It describes how many items pass by at a given time. | |||
So, there are three opportunities to enhance the throughput: | |||
; More density | |||
:Sometimes items have small gaps in between each other that aren't big enough for other items to fit in. However, mining drills, inserters, and belt sideloading can still force an item into these gaps, temporarily squashing the items on the belt. The squashed gap is extended to normal size once the front of the belt starts to move again. | |||
; More speed | |||
:If the belts in the factory are already at maximum density, their speed can still be upgraded with better belts. Finding the bottleneck is the first thing that needs to be done, usually it can be discovered quite easily. There will be a part of the belt where the items don't move quickly (or at all) or stop at maximum density and suddenly they come to a point where this 'stop and go' effect releases itself, the bottleneck has been found. In most cases, this will be the place where belt optimization is needed. | |||
; More belts | |||
:Adding additional parallel belts can also increase the throughput. Simply place more belts carrying the item that needs throughput. | |||
=== Belt tricks === | |||
Moving fast can be essential to defend alien attacks in time. Running on a belt will increase or decrease the movement speed of the [[player]] accordingly to the belts speed. That is why building a belt towards your [[defense]]s can be beneficial. | |||
However, the player is not the only unit that can be moved by transport belts. Additionally, biters and spitters can be moved. This can be abused to improve your defense. Firstly, biters will have a harder time to reach your walls when placing express transport belt in front of them. Secondly, spitters can be moved closer to your walls. That way more turrets can attack a single spitter at once. | |||
Another useful usage is [[car]]s on transport belts. Cars have an inventory and can be filled by [[inserters]]. So, they can be used as moving boxes on belts. This has several advantages: Firstly the throughput of the belt-car-boxes is amazingly high, secondly the inserter stack size bonus does apply here and makes inserters more effective. | |||
== Splitters == | |||
[[Splitters]] are another form of item manipulation. Splitters are a 2×1 entity that splits incoming items on belts | |||
from up to two input to up to two outputs, in a 1:1 ratio. They are used to divide resources between two belts, or balance | |||
multiple belts. | |||
=== Mechanics === | |||
The behavior of splitters looks simple at first glance. But they are not that simple. Splitters have an astonishing amount of uses. | |||
* Splitters have two input belts and two output belts. If the splitter receives items on one belt, it will split the input evenly between its two outputs. If one of the outputs is fully backed-up and the splitter cannot split evenly, it will put all input on its other output. | |||
* Splitters can also merge belts, taking two inputs and one output. | |||
* Splitters preserve the lanes of the items, by moving through the splitter an item on the right lane will not be moved to the left lane, and vice versa. | |||
* Splitters can prioritize one input and/or one output. Clicking on a splitter opens its GUI where the priorities can be set. | |||
* One output of the splitter can be filtered to one item. Items of that type will only go to that output, and not to the other one. When a filter is set, the output of that side is prioritized. | |||
The speed of the splitter is the same as its relevant type of belt, so in order to properly join/split belts, the splitter must be the same speed as the incoming belts. Otherwise the splitter will become a bottleneck. | |||
== | ==== Priority ==== | ||
For both the input and output side of the splitter it is possible to set the priority to either left or right. | |||
A splitter where the input priority has been set will first try to consume the specified input side, and will only | |||
consume the other input once there is a gap on the prioritized input belt. | |||
Similarly a splitter where the output priority has been set will try to redirect all incoming items | |||
to the specified output, and will only output on the other output once the specified output is full. | |||
==== Filter ==== | |||
If a specific item is set in the splitter's filter slot, the slider for the output priority will | |||
be used for the filter instead. All items of the set type will be redirected to that specific output | |||
and all other items are directed to the other output. The input priority can be set independently of the filter. | |||
=== Balancing === | |||
{{Main|Balancer mechanics}} | |||
{{ | |||
Balancers are used to evenly distribute items over multiple belts or multiple belt lanes. | |||
=== Manipulating belt lanes === | |||
<gallery mode="slideshow"> | |||
File:Swap_belt_lanes.png|Swapping lanes on a belt with a different item per belt lane. | |||
File:Splitter_seperate_belt_lanes.png|Separating lanes with different items on them. | |||
</gallery> | |||
== [[Circuit network]] == | |||
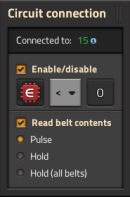
[[File:transport_belt_circuits.png|thumb|200px|Two belts connected to a [[constant combinator]].]][[Red wire|Red]] or [[green wire]]s can be connected to segments of transport belts to use them as part of a circuit. Belts connected to the circuit network will appear with a yellow cage above them, with a moving red scanner within it. When a belt is connected to a circuit, a GUI can be accessed from the connected belt for settings on how the belt will be used for a circuit; there are two modes of operation that can be used: | |||
'''Enable/disable''' - A circuit condition dictates whether or not the belt will allow items through.<br /> | |||
'''Read belt contents''' - If enabled, the contents on the belt will be read. | |||
The belt's GUI will also have a "content read mode" setting, which can be set to either '''pulse''' or '''hold'''. '''Pulse''' will read the belt's contents for only one [[Time|tick]], while '''hold''' will read the belt's contents continuously on every tick. | |||
[[File:transport_belt_circuit_gui.png|thumb|right|Transport belt GUI.|130px]] | |||
<gallery mode="slideshow"> | |||
File:transport_belt_circuit_example1.gif|A small example of a transport belt circuit reading belt contents to trigger two lamps. | |||
File:transport_belt_circuit_example2.gif|[[Fast inserter]]s are activated by the [[arithmetic combinator]]s' setup; when a specific item enters a belt segment that's connected to the circuit network, the inserters place the same item on another belt. | |||
</gallery> | |||
{{clear}} | |||
== Underground belts == | |||
Underground belts can be used to cross different flows of items without interfering. They move items like a [[Transport belts|normal belt]]. | |||
* Underground belts can cross any number of entities and all types of ground, like water and grass. (as long as the input and output endpoints are on land) | |||
* | * Underground belts can cross other underground entities (any number of underground belts or underground pipes). They won't be mixed. | ||
* For the connection only the endpoints (entry-side and exit-side) are relevant. | |||
* The maximum distance underground is 8 [[Map_structure#Tile|tiles]] with [[express underground belt]]s. | |||
* An underground belt pair that bridges a gap of 4 tiles stores up to 44 items. An express underground belt pair at max length stores up to 72 items. | |||
* The half of the underground belt tile with a belt can accept input from the side. The other half (with a tunnel entrance) blocks incoming items. | |||
=== Separating belt lanes === | |||
<gallery mode="slideshow"> | |||
File:Block belt lane.png|This is built by placing one underground belt and then using R to reverse its direction. This converts the underground belt entrance to an exit (and vice versa). | |||
File:Transport belts unmerge.gif|This can also be used to split the lanes of a belt onto seperate belts instead of using a splitter filter. | |||
</gallery> | |||
== | == See also == | ||
* [[ | * [[Splitters]] | ||
* [[ | * [[Transport belts]] | ||
* [[ | * [[Underground belts]] | ||
{{C|Belt transport system}} | |||
{{C| | |||
Revision as of 10:04, 21 May 2020
翻訳途中のページ Taranlating page
---
ベルト輸送システム(Belt transport system)は、アイテムを異なる場所の間で輸送するためにプレイヤーが最初に触れることとなるシステムです。
ベルト輸送システムは列車、物流ロボットと並んで、Factorioにおけるアイテム輸送システムを構成しています。
搬送ベルトは特にアイテムの輸送に用いられ、エネルギーを使わずに稼働します。ベルトは他の動くエンティティ、例えばプレイヤー、乗り物やバイターとも干渉することが可能で、その動きを速めたり遅めたりすることができます。
概要
ベルトには3つのティアが存在します。最初のティアの属するには搬送ベルトです。搬送ベルトは黄色いベルトで、最も遅いベルトですが、最も製造コストが安いベルトでもあります。次のティアに属するのは
高速搬送ベルトです。赤いベルトで、通常の搬送ベルトよりも2倍高速です。最後のティアに属するのは超高速搬送ベルトです。これは青いベルトで、搬送ベルトの3倍、ないし高速搬送ベルトの1.5倍高速です。
| 搬送ベルト | 地下搬送ベルト | 分配機 | 最大スループット (個/秒) |
必要研究 |
|---|---|---|---|---|
| 搬送ベルト | 地下搬送ベルト | 分配器 | 15 | 物流学11 |
| 高速搬送ベルト | 高速地下搬送ベルト | 高速分配器 | 30 | 物流学2 |
| 超高速搬送ベルト | 超高速地下搬送ベルト | 超高速分配器 | 45 | 物流学3 |
(1) 地下搬送ベルトと分配器のみ。搬送ベルトはゲーム開始時から利用可能。
ティアに関係なく、アイテムで一杯になったベルトは8つのアイテムを保持できます。詳細はFriday Facts #276 - Belt item spacing参照。
Belt mechanics
Merging and un-merging belts
Belts of all tiers have 2 lanes for items to ride on. This allows for either a double flow of one material, or to transport two different materials on the same belt. Mixed belts can be beneficial for smelting ore, or producing items with many different ingredients such as Utility science pack. The belt can be unmerged using a splitter filter. It is also possible to unmerge a mixed belt by using underground belts since an underground belt will block half of the belt.
Commonly, merging and un-merging is done by using a splitter. The trick in the second gif is better described in the Underground Belt section.
Lane balance
Due to how items are placed onto belts by inserters, their lanes can sometimes become unbalanced. In order to maintain throughput, balancing the lanes may be necessary. The gifs below show two ways how to do this. The former only works if only one lane is in use initially. For further explanation of the mechanics, see lane balancers.
Belt throughput
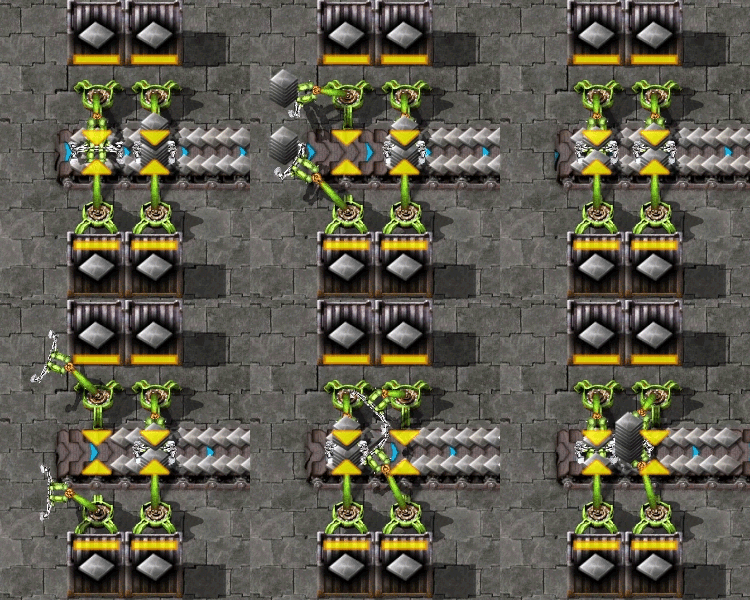
Maximizing the throughput means ensuring that as many items as possible are transported. Therefore some definitions need to be introduced:
- Speed
- How fast a belt moves in tiles per second. This is 1.875, 3.75 and 5.625 for basic, fast and express belts.
- Density
- How tight are the items put onto the belts; each straight belt piece can hold exactly 8 items.
- Throughput
- This is speed × density. It describes how many items pass by at a given time.
So, there are three opportunities to enhance the throughput:
- More density
- Sometimes items have small gaps in between each other that aren't big enough for other items to fit in. However, mining drills, inserters, and belt sideloading can still force an item into these gaps, temporarily squashing the items on the belt. The squashed gap is extended to normal size once the front of the belt starts to move again.
- More speed
- If the belts in the factory are already at maximum density, their speed can still be upgraded with better belts. Finding the bottleneck is the first thing that needs to be done, usually it can be discovered quite easily. There will be a part of the belt where the items don't move quickly (or at all) or stop at maximum density and suddenly they come to a point where this 'stop and go' effect releases itself, the bottleneck has been found. In most cases, this will be the place where belt optimization is needed.
- More belts
- Adding additional parallel belts can also increase the throughput. Simply place more belts carrying the item that needs throughput.
Belt tricks
Moving fast can be essential to defend alien attacks in time. Running on a belt will increase or decrease the movement speed of the player accordingly to the belts speed. That is why building a belt towards your defenses can be beneficial.
However, the player is not the only unit that can be moved by transport belts. Additionally, biters and spitters can be moved. This can be abused to improve your defense. Firstly, biters will have a harder time to reach your walls when placing express transport belt in front of them. Secondly, spitters can be moved closer to your walls. That way more turrets can attack a single spitter at once.
Another useful usage is cars on transport belts. Cars have an inventory and can be filled by inserters. So, they can be used as moving boxes on belts. This has several advantages: Firstly the throughput of the belt-car-boxes is amazingly high, secondly the inserter stack size bonus does apply here and makes inserters more effective.
Splitters
Splitters are another form of item manipulation. Splitters are a 2×1 entity that splits incoming items on belts from up to two input to up to two outputs, in a 1:1 ratio. They are used to divide resources between two belts, or balance multiple belts.
Mechanics
The behavior of splitters looks simple at first glance. But they are not that simple. Splitters have an astonishing amount of uses.
- Splitters have two input belts and two output belts. If the splitter receives items on one belt, it will split the input evenly between its two outputs. If one of the outputs is fully backed-up and the splitter cannot split evenly, it will put all input on its other output.
- Splitters can also merge belts, taking two inputs and one output.
- Splitters preserve the lanes of the items, by moving through the splitter an item on the right lane will not be moved to the left lane, and vice versa.
- Splitters can prioritize one input and/or one output. Clicking on a splitter opens its GUI where the priorities can be set.
- One output of the splitter can be filtered to one item. Items of that type will only go to that output, and not to the other one. When a filter is set, the output of that side is prioritized.
The speed of the splitter is the same as its relevant type of belt, so in order to properly join/split belts, the splitter must be the same speed as the incoming belts. Otherwise the splitter will become a bottleneck.
Priority
For both the input and output side of the splitter it is possible to set the priority to either left or right.
A splitter where the input priority has been set will first try to consume the specified input side, and will only consume the other input once there is a gap on the prioritized input belt.
Similarly a splitter where the output priority has been set will try to redirect all incoming items to the specified output, and will only output on the other output once the specified output is full.
Filter
If a specific item is set in the splitter's filter slot, the slider for the output priority will be used for the filter instead. All items of the set type will be redirected to that specific output and all other items are directed to the other output. The input priority can be set independently of the filter.
Balancing
- Main article: Balancer mechanics
Balancers are used to evenly distribute items over multiple belts or multiple belt lanes.
Manipulating belt lanes
Circuit network
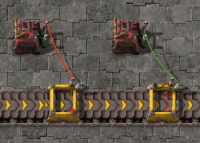
Red or green wires can be connected to segments of transport belts to use them as part of a circuit. Belts connected to the circuit network will appear with a yellow cage above them, with a moving red scanner within it. When a belt is connected to a circuit, a GUI can be accessed from the connected belt for settings on how the belt will be used for a circuit; there are two modes of operation that can be used:
Enable/disable - A circuit condition dictates whether or not the belt will allow items through.
Read belt contents - If enabled, the contents on the belt will be read.
The belt's GUI will also have a "content read mode" setting, which can be set to either pulse or hold. Pulse will read the belt's contents for only one tick, while hold will read the belt's contents continuously on every tick.
Underground belts
Underground belts can be used to cross different flows of items without interfering. They move items like a normal belt.
- Underground belts can cross any number of entities and all types of ground, like water and grass. (as long as the input and output endpoints are on land)
- Underground belts can cross other underground entities (any number of underground belts or underground pipes). They won't be mixed.
- For the connection only the endpoints (entry-side and exit-side) are relevant.
- The maximum distance underground is 8 tiles with express underground belts.
- An underground belt pair that bridges a gap of 4 tiles stores up to 44 items. An express underground belt pair at max length stores up to 72 items.
- The half of the underground belt tile with a belt can accept input from the side. The other half (with a tunnel entrance) blocks incoming items.
