Railway
| Page "Railway" has been recommended for clean-up. Reason: Lots of outdated info, should be updated to completely reflect V0.13. The large amount of links at the bottom should also be dealt with. |
|---|
| This may mean fixing grammar or broken links, providing better explanations, or removing incorrect/outdated info. |
| Further recommendations for this page's clean-up can be made at Talk:Railway. |
For the research see Railway (research)
The Railway is one of the main transport methods in Factorio. Although the installation of such a network can be complicated, and requires a large amount of resource and space, it is faster and more efficient than belts and robot logistics, especially over large distances.
Railway construction, however, is not understood in an instant. It takes some time to learn the basics, such as automating transportation. Learning how to manage and upkeep a larger train network takes time and experience.
- Railway/Tutorials
- Sometimes a picture/video says more than a thousand words.
Tracks
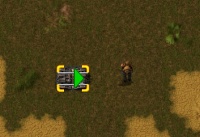
Rails are placed using the rail planner. Place a single rail, then mouse over the rail while still holding rails in hand. A green arrow will appear on the rail indicating the direction the new rail will be placed. Click or shift-click on the triangle to start the manual or ghost planner.
Bear in mind that rails can rails are placed on a two-tile grid, so you cannot move a rail by only one tile.
Manual Planner
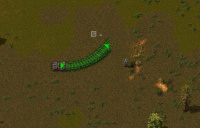
The manual planner can be used to place rails at close range, around 10 rails at a time. The rails will path towards the cursor. Move the cursor until you get the desired path, then left-click to place the rails. This process will repeat until you press Esc to release the planner.
Ghost Planner
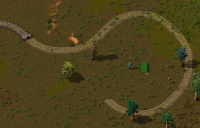
The ghost planner can be used to place long stretches of rail at once, by creating ghosts of rails that can be placed by construction robots, either from roboports or a personal roboport. Move the cursor to the position you want the rail to terminate, press R to rotate the last rail to the desired orientation, then left-click to place the ghost rails. The rails will be placed using the shortest route from the origin to the destination avoiding obstacles. You can shift-click to use the shortest route; trees and stone rocks in the way will be marked for destruction. Use Esc or Q to release the planner.
Switches
- There is no visual representation of a working switch. Using the rail planner, the player must place a rail overlapping an existing rail to form a switch.
- The crossing of two straight tracks is not usable as switch, as trains have a limited turning radius. They do, however, connect signal blocks which helps prevent collisions.
- Parallel tracks do not interact with each other and generally have no problems. However, switching from one track to the other can require extra resources if they are too close together; the track must turn away from the other parallel track and then turn back to it. This can create complicated networks of signals and, as such, one should generally not build parallel tracks unless they are spaced adequately.
Crossing tracks
Be careful when crossing tracks!
Trains travel extremely quickly, and deal large amounts of damage when they impact a target. If no precautions are taken, crossing the track can result in a swift death.
Avoiding unwanted contact with trains
A checklist of proper track crossing etiquette:
- Zoom out, so that you can see a train coming.
- Look left, then right.
- Check for signals nearby: If a rail signal suddenly jumps from green to red or green to yellow, a train is coming. Do not cross.
- Avoid walking near the tracks, as you do not need to be fully on the tracks to get hit.
- While it is possible to get into/out of a train while it is moving, a miss can cost your life. The sides of the train can still deal damage.
- Heavy shields can be used to reduce the damage taken. In extreme cases, it is possible to stop a train with your body.
- All entities with health will take damage getting hit by a train, so take care not to leave a Car or Tank on the tracks.
- Trains far from a train stop will be travelling at (near) max speed, so take extra precaution when crossing and zoom out further. Trains near a train stop or signal will slow down to stop, and will be travelling slower.
Cross the tracks safely
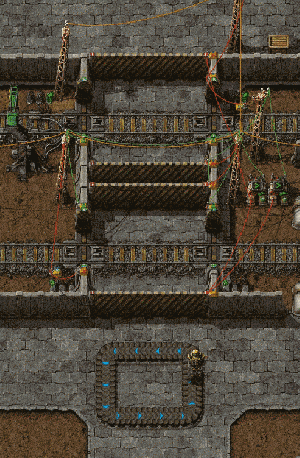
Since version 0.13, a safe railroad crossing like the example shown in the picture can be built. This works by restricting access to the tracks when an oncoming train has the rails reserved. When the player is on the rails, the signals are reserved by the circuit network, and the train must stop and wait until the player leaves the tracks. When a player is inside the area crossing the tracks, the train gates are closed so the player can't get on the tracks outside the crossing. This is to completely ensure a safe crossing.
Trains
| Diesel locomotive | Cargo wagon |- |

- A train consists of at least one locomotive, but the player may add additional locomotives to keep the train moving at maximum speed, allow it to move in both directions automatically, or they may add Cargo wagons to transport resources with the train.
- Locomotives may be manually driven forwards or backwards, however, locomotives are generally slower going backwards. The left and right movement keys are used to change direction at switches.
- Trains can only drive forwards automatically; there must be a forward path from to the destination station. This can be solved by placing a locomotive at either end of a train (facing opposite directions), or adding a loop in the rail. Note that signals in a loop can misbehave due to detecting trains before they arrive.
- A train needs fuel to drive. Fuel can be added by inserters.
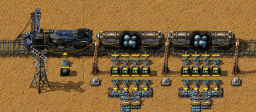
The locomotives' inventory is only used for Fuel. To transport items Cargo wagons have to be attached to the train. To attach a Cargo wagon, the player may either prepare to place one near an existing train, where a green graphic will show the player that the cargo wagon will be attached, showing a connection between the train and the new wagon. Alternatively, the player may manually connect cargo wagons to trains with the stock connect key, if the cargo wagon was placed far away from a train. The cargo wagons can be filled manually or by adjacent Inserters.
Stations
A train station is a combination of at least one train stop plus a storage and/or distribution system, used to
- fill or empty Cargo wagons, or
- load fuel into the locomotive(s), or
- repair trains.
Don't mix up train stations with train stops.
- A train station is a concept, whereas a train stop is an item.
Position of the inserters
Inserters placed next to train tracks are used to load/unload trains at train stops. For detailed information on where to place train stop inserters, see Inserter positions.
Using roboports and logistic bots as station integrated storage
Logistic chests can be used to load or unload from a train, allowing a train station to operate completely within the logistic system. Requester chests and Provider chests are used for loading and unloading respectively. Note that trains cannot be loaded or unloaded by logistic robots directly: use inserters and logistic chests.
Examples
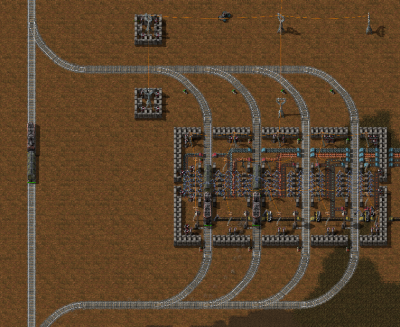
- Example#1: Second pic.
- Example#2: Last pic on the page.
- Trains and robots.
Other
- Trains can only be filled or emptied when they are fully stopped.
- In automatic mode, trains will usually stop only at train stops. Exceptions are destruction of the tracks and running out of fuel, both of which will stop the train.
- If you drive the train yourself, you can stop the train anywhere.
- See Railway network/The renaming-of-train-stop-trick: Trains find all train stops with the same name.
- If you have multiple unloading stations and want to distribute the trains equally you can use a stacker station.
Signals
| Rail signal | Rail chain signal |- |
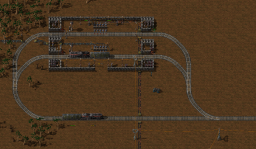
Understanding rail signals can be difficult. Several terms critical to understanding them are below:
- Rail segment
- A piece of track (one item).
- Segment
- A single path of continuous track without intersections or switches. This becomes important when signals are employed. The player may mouse over a segment to see its number.
- Block
- A set of segments defined by rail signals. By default every connected segment belongs to one block, no matter whether a train can drive on it or not, and even if it can be driven only in one direction (e.g. at a switch, both segments of the switch belong to the same block). The player can see the current block numbers of a rail piece in the info section on mouseover. See also this forum post for a good explanation about blocks.
Rail signals are used to employ multiple trains automatically. Note that driving a train manually ignores most of the rules described here; other automatic trains will follow signaling indicted by the player's movement dynamically, however it will sometimes be not possible to avoid a collision for automatic trains if the player ignores red/yellow signals. Always beware automatic trains and give them the right of way.
Basic Signalling Rules
- There is at most one Train in a block at any time. A train spanning multiple blocks occupies them all.
- A red signal means that the following block is occupied by a train.
- A yellow signal means that a train is approaching and already has the approval to enter the following block.
- Rail signals separate a new block and reflect its state: green - free, yellow - reserved, red - occupied
- Rail chain signals separate a new block and reflect the state of the next Rail signal
- A train can only pass a signal on the right of the track, or if there is a signal on both sides on the same rail segment.
Deadlocks
A deadlock or gridlock can happen, when every train is locked by another. In nearly every case two or more trains are standing so, that every train blocks by minimum one other train.
How can a deadlock happen?
See this article.
Factors that influence the deadlock chance
- It depends on train length (shorter trains will have a lower chance with the same rail/signal layout)
- Depends also on size of the blocks: More space for the blocks means lower chance of deadlock.
- Depends on track layout: Some layouts have a higher chance of locking, than others.
- The more trains you have, the bigger the chance.
- The chance is also much higher, if the trains need to wait often in areas with rail-crossings.
A deadlock can happen only by chance
Deadlocks will happen by chance only!
It is possible, that you use a quite volunerable layout, but with short trains and low traffic you never achive a deadlock in a game. The same can happen the other way around.
There is no simple mechanism to forecast, if and when a deadlock can happen, but with some experience and using the above ideas and the links below, this is a easy manageable problem.
How to reduce the chance for gridlock?
- Don't use 4-way junctions or circles to create junctions.
- Use better 3-way junctions. See A Detailed Look at a Bidirectional Three-way Train Intersection
- Use circles only for changing direction of train
- Build more tracks around junctions. try to avoid jams around junctions. If that doesn't help, use more tracks. :)
Railway Safety
Trains travel very quickly and deal great damage upon impact. Without proper railway safety, crossing an active track can result in a swift death.
Some tips for avoiding unwanted contact with trains:
- Zoom out before crossing so you can see trains coming.
- Check for nearby signals; if a signal changes from green to yellow or red, this means a train is approaching.
- Avoid walking near tracks; you can be hit even if you are not fully on the track.
- Do not try to enter/exit a train while it is moving.
Crossing Safely
A safe railway crossing can be created by never allowing a train and the player on the track at the same time. When a train has the segment reserved, the gates close to the player, restricting access to tracks. When the player is on the tracks, the signals are reserved by the circuit network, and trains must wait for the player to clear the tracks before continuing. The gates onto the rest of the track also close, preventing the player from getting to the tracks outside the crossing.
Automated transport
This section covers items used to make trains automatically transport items between stations. The player should be familiar with creating a rail system.
At first the player has to setup a rail system with at least two train stops, which are placed in the right-hand side of the expected train arrival direction. By hovering over the train stop with your mouse you see the positions of the vehicles for better setting up the train station (including un/loading machinery, refueling/repair installations).
When you set up the train schedule (see below) and fueled the train, you can start the train on it's schedule by switching from manual to automatic driving mode.
Train schedule
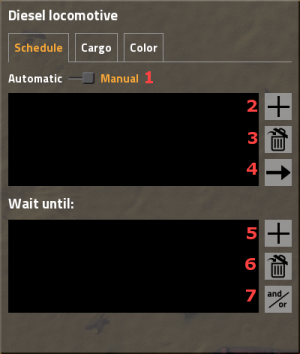
You can set up a list of train stops in the upper window. The train will run to the stops in the given order, if it's at the end it will continue with the first. Stops can be added by clicking button 2 (see picture). A popup appears with a list of all train stops. If you select one another popup appears where you have to select a wait condition.
Wait conditions are used to tell the train when to leave the station. There are 6 types of wait condition:
- Time passed - the only one available until version 0.12.
- Inventory full - All inventories of the train are full.
- Inventory empty - Same as above, but empty.
- Item count - The train (all cargoes summed) contains a specific amount of a certain item.
- Circuit condition - The train stop is connectible to the Circuit network, so the signals can used for wait conditions.
- Inactivity - No items were added or removed for the specified amount of seconds.
Hereafter the word "term" is used to describe one type of wait condition, and the words "wait condition" are used to describe the whole set of terms (it turns a bit into maths).
If you add more than one term, you can change the connection of those using the logical operators AND and OR (button 7). An AND condition will result in true if all terms are true. An OR condition will return true if at least one of the terms is true. If you have multiple terms connected with AND and OR in your list, the train checks will calculate the conditions in order.
Examples
Wait until full, up to 30 seconds:
Full cargo inventory
OR 30 seconds passed
Wait until cargo full, or circuit condition Oil > 3000:
Full cargo inventory
OR Circuit condition - Oil > 3000
Wait until empty, and 30 seconds passed, and 5 seconds of inactivity:
Empty cargo inventory
AND 30 seconds passed
AND 5 seconds of inactivity
Wait until iron ore is low, or copper ore is low and at least 30 seconds passed:
Cargo: Iron ore < 500
AND 30 seconds passed
OR Cargo: Copper ore < 500
AND 30 seconds passed
This last example is processed as (note the parenthesis):
((Cargo: Iron ore < 500 AND 30 seconds passed) OR (Cargo: Copper ore < 500 AND 30 seconds passed))
Which is the same as this:
((Cargo: Iron ore < 500 OR Cargo: Copper ore < 500) AND 30 seconds passed)
Unfortunately, there is no way to write that shorter form in the current UI.
Train doesn't move?
- Train is fueled? Ensure that the locomotive has fuel of some kind.
- Misplaced or non-functional switches? Ensure that the train can plan a path through the switches.
- Another train on the same segment or block? Make sure the path of the train is unobstructed.
- Train stops placed correctly? Make sure that the yellow arrows when hovering on the stop point towards the end or exit of the stop.
- Is the train allowed to enter signals from the right direction? Are the signals set correctly?
No path?
When trains cannot reach the target, a "no path" symbol pops up over the locomotive. Check:
- Can the train reach every station by only driving forward? Build turning slopes or place a locomotive at both ends of a train!
- Are the train stops standing in the right direction?
- if you use rail signals, check that the signals are all allowing traffic in the correct direction.
Defence of rail systems
As trains are a priority target of Enemies, any place where trains can stop should be (more or less) defended. This is of course more important at train stops/stations. When a train moves it is more or less invincible and destroys nearly everything in the way, especially Enemies and players.
Relationship to OpenTTD
Factorio's railway system works basically exactly like the block signals in Open Traffic Tycoon Deluxe. Players who have ever played that game will find some elements of it in Factorio. If not, they can learn from the OpenTTD documentation.
User tips and tricks
This section contains further links to in-depth knowledge. As a general advisory, tips given in this section detail the more intricate mechanics in the game and can be dangerous to the experience of players who wish to discover better methods on their own. Be warned that much of the info below could be outdated/incorrect.
Tutorials
Factorio is an alpha version and you need to lay the rail-sections piece by piece. It's not as hard as you might think but railway can currently not be explained in simple words and even pictures don't describe it well.
Videos
We recommend viewing some videos of how to build a simple railway, which makes the basic steps very simple.
- Factorio Tutorial: Signals and Multi-train Networks by Gepwin (read the whole article!)
- Factorio Traintorial, all about trains by Gepwin.
- v0.10, english Rail basics tutorial by MangledPork Gaming.
- And the second part of the tutorial Factorio Rail Tutorial Part 2: Signals
- Let's play: Have a look into the list of known let's play videos!
- A train-signal tutorial with pictures.
- v0.8, english Inzainia Plays: Factorio ver 0.8.0 EP:8 (Trains, Trains, Trains!!!)
- v0.6, german Silver's Factorio Basic Train Tutorial
- Or look some Let's play factorio :)
General Beginner Strategy
Do not immediately begin to build a railway, fully running. Try to make a circle first and expand it. Play around with all items.
A general strategy to begin:
- At first you need tracks. You can craft the tracks of course yourself, but we recommend to automate crafting for that, because you need many.
- Build an iron stick assembly, feed with this one assembly for Straight rail and Curved rail.
- For the beginning you need about 100-200 straight and 10-20 curved rails, about ten times more straight rails than curves.
- Place some rails and built a small track.
- Craft a Diesel locomotive and a Cargo wagon.
- Place both on the built tracks, so that they connect to a train.
- Put Fuel into the loco.
- Enter the locomotive (press enter while standing besides) and drive around. :)
About Trains
- Vehicle/Train - the handling of loco and wagon
- Railway/Train path finding - how the trains find their path.
About train stations and stops
- Railway/Train stations - about the loading/unloading of trains
- Railway/Automated transport - all about automated transport.
About Signalling
Misc tips
- When supply trains follow the player: http://www.factorioforums.com/forum/viewtopic.php?f=5&t=6203
- The player may lay rails by sitting inside of the train.
